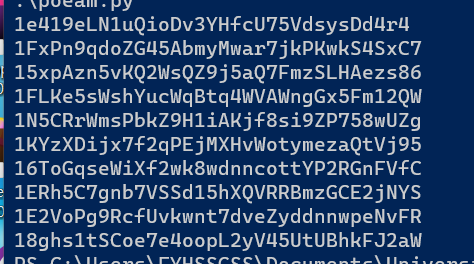
本学期相对比较比较比较有意思的一门课,要把学习的过程记录下来。
Week1 环境安装 安装go环境,下载jb公司的Goland(半年前下载的),自带了一个go 16.8 windows/amd64版本,在linux下
1 sudo apt install golang-go
一键就能装好新版本,是go version go1.13.8 linux/amd64。
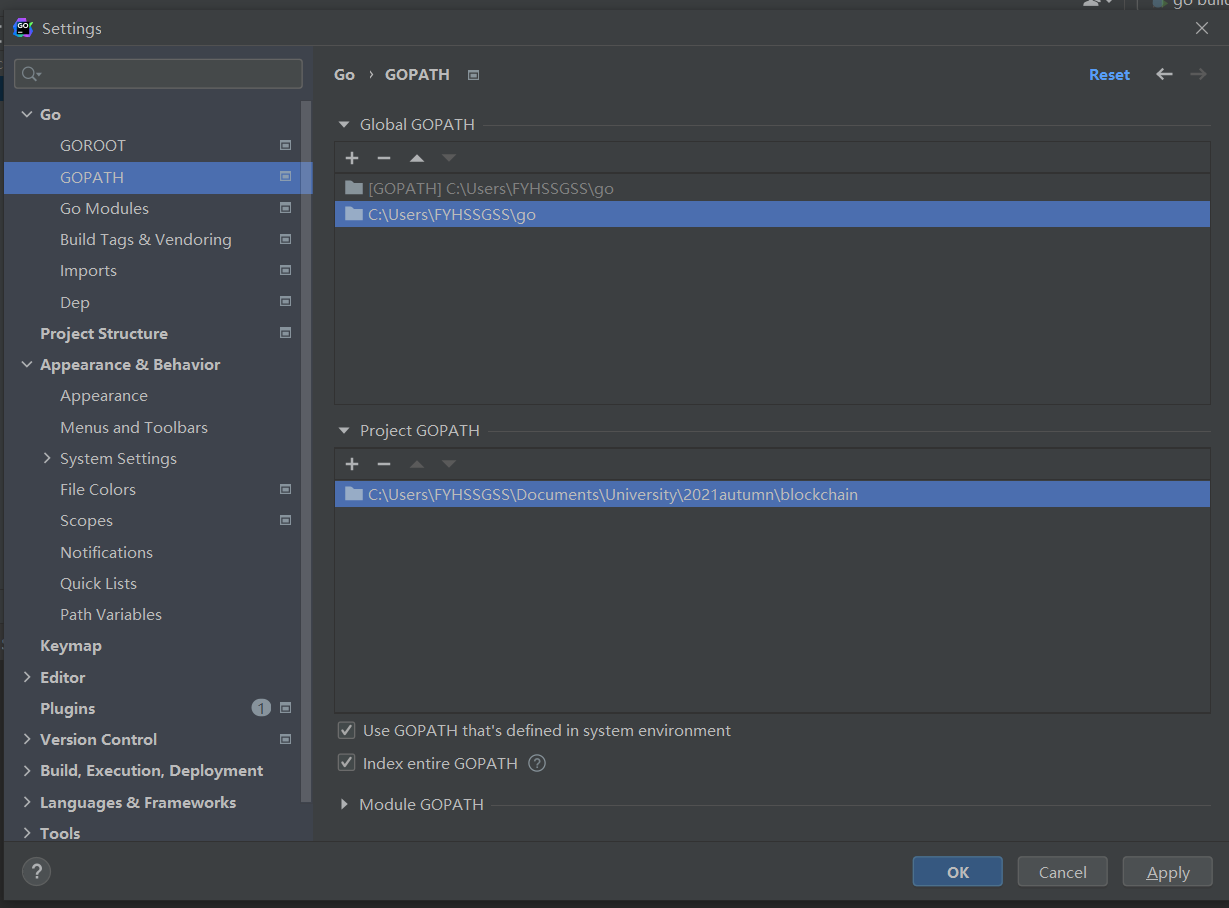
然后配置gopath,gopath的作用是存放sdk以外的第三方类库和自己复用的代码,一般GOPATH分为Global GOPATH和Project GOPATH,而gopath里包含三个文件:src(源代码),pkg(中间文件),bin(可执行文件),具体的我还没搞明白,反正目前长这样:
然后在Run/Debug Configurations里选用go build就能编译代码了。
我的helloworld:
1
2
3
4
5
6
package mainimport "fmt" func main () fmt.Printf("hello world\n" ) }
GO初学踩坑 bx 发现了一个好东西,叫做bitcoin-explorer,中文名是区块链-比特币浏览器,它是一个独立的、跨平台的比特币命令行工具,方便我debug用的,但是我在linux上没下到。
网址是https://blockexplorer.com/
Bitcoin Command Line Tool:命令行下载网址:https://github.com/libbitcoin/libbitcoin-explorer
防止翻车我去下到我的虚拟机里了,需要进行一波巨长的install.sh,最后一波有连续六个git clone,能不能克隆下来完全靠脸,我最高记录是到第五轮寄了,要改的话得去改800多行的.sh文件,但我懒得改了,就这样吧。
文件位置 设置好gopath后,为了调用golang.org/x/crypto/ripemd160这个函数,我把golang.org这个文件夹放在了$GOPATH/src下,但是仍然无法在我的项目下build,一直显示这个错误:
1
2
no required module provides package golang.org/x/crypto/ripemd160; to add it go get golang.org/x/crypto/ripemd160
当时就一脸懵逼,我不是库都装好了吗,为啥他找不到,最后的解决是我把项目文件放到$GOPATH/src下的同目录下了,终于能进行正常的import了。
package问题 当你做这个实验,你要整个项目都以package形式build的话,你要修改你的package main,表示这是一个入口文件,然后才能go build.
等你实验做完了,要把当成一个package了,以后想用这个函数,再把package name改成原来那个就行。
实验 三个数lcm 秒了
1
2
3
4
5
6
7
8
9
10
11
12
13
14
15
16
17
18
package mainimport "fmt" func gcd (a, b int ) int if b == 0 { return a } return gcd(b, a%b) } func lcm (a, b int ) int return a * b / gcd(a, b) } func three_lcm_test () var a, b, c int fmt.Scan(&a, &b, &c) fmt.Printf("%d" , lcm(lcm(a, b), c)) }
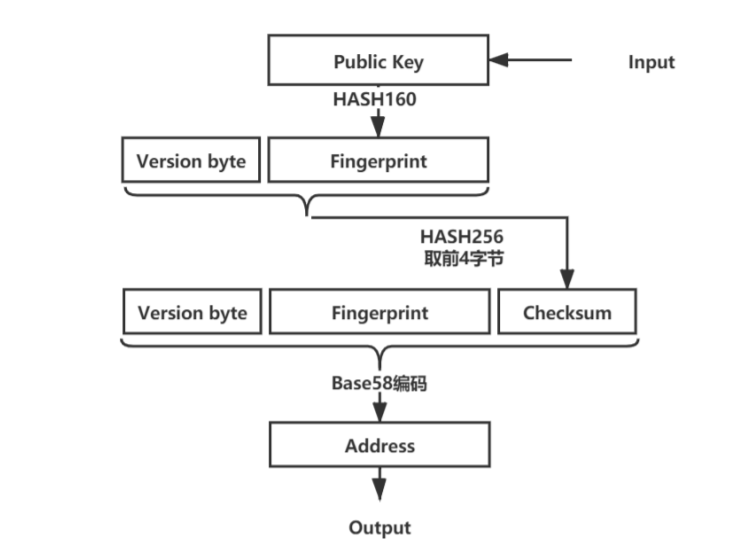
生成比特币交易地址
收集到的比特币公私钥和地址各种格式前缀
种类
版本前缀 (hex)
Bitcoin Address
0x00
Pay-to-Script-Hash Address
0x05
Bitcoin Testnet Address
0x6F
Private Key WIF
0x80
BIP38 Encrypted Private Key
0x0142
BIP32 Extended Public Key
0x0488B21E
在本次实验中我们选用的Bitcoin Testnet Address,故版本前缀为0x6F
1
2
3
4
5
6
7
8
9
10
11
12
13
14
15
16
17
18
19
20
21
22
23
24
25
26
27
28
29
30
31
32
33
34
35
36
37
38
39
40
41
42
43
44
45
package mainimport ( "base58" "crypto/sha256" "encoding/hex" "fmt" "golang.org/x/crypto/ripemd160" ) var VersionByte = []byte ("\x6f" )func Sha256 (src []byte ) []byte m := sha256.New() m.Write(src) return m.Sum(nil ) } func Ripemd160 (src []byte ) []byte m := ripemd160.New() m.Write(src) return m.Sum(nil ) } func Hash160 (src []byte ) []byte return Ripemd160(Sha256(src)) } func Hash256 (src []byte ) []byte return Sha256(Sha256(src)) } func Base58 (src []byte ) string myAlphabet := base58.BitcoinAlphabet encodedString := base58.Encode(src, myAlphabet) return encodedString } func getAddress (src []byte ) string fingerprint := Hash160(src) Checksum := Hash256((append (VersionByte, fingerprint...)))[:4 ] var base = append (append (VersionByte, fingerprint...), Checksum...) return Base58(base) } func TestURL () var data string fmt.Scanf("%s" , &data) pubkey, _ := hex.DecodeString(data) fmt.Printf("%s\n" , getAddress(pubkey)) }
在代码实现的时候纠结了一会[]byte和string的事情,还有上来不知道hex.DecodeString,还自己手动对读进来的字符串进行两两分组然后sscanf..
Merkle Tree 可以简单理解为一棵二叉树的哈希,只有叶节点存交易数据块,如果订单发生改变,那么这条链的哈希值都会发生改变,所以在分析哪里发生交易了,就可以从根节点往下dfs,一直往哈希值改变的儿子走,走$log$次就能走到发生改变的节点。
于是实现的时候采用了动态开节点,为了方便定位叶子节点的位置,所以在传参的时候传了个当前编号,编号规则类似与线段树,在比较两棵树的时候就往下递归查询即可,compareMerkleTree函数会返回发生数据变化的节点块。
1
2
3
4
5
6
7
8
9
10
11
12
13
14
15
16
17
18
19
20
21
22
23
24
25
26
27
28
29
30
31
32
33
34
35
36
37
38
39
40
41
42
43
44
45
46
47
48
49
50
51
52
53
54
55
56
57
58
59
60
61
62
63
64
65
66
67
package mainimport ( "encoding/hex" "fmt" ) type MerkleNode struct { lson *MerkleNode rson *MerkleNode Data []byte } func createNode (left, right *MerkleNode, data []byte ) *MerkleNode now := MerkleNode{} if left == nil && right == nil { now.Data = Sha256(data) } else { mix := append (left.Data, right.Data...) now.Data = Sha256(mix) } now.lson = left now.rson = right return &now } func build (depth, id, total int , params [][]byte ) *MerkleNode if depth == total { here := createNode(nil , nil , params[id-(1 <<depth)]) return here } else { lson := build(depth+1 , id<<1 , total, params) rson := build(depth+1 , id<<1 |1 , total, params) here := createNode(lson, rson, nil ) return here } } func compareMerkleTree (tree1, tree2 *MerkleNode, depth, id, total int ) int if depth == total { if hex.EncodeToString(tree1.Data) != hex.EncodeToString(tree2.Data) { return id - (1 << depth) } } if tree1.lson != nil && tree2.lson != nil { res := compareMerkleTree(tree1.lson, tree2.lson, depth+1 , id<<1 , total) if res != -1 { return res } } if tree1.rson != nil && tree2.rson != nil { res := compareMerkleTree(tree1.rson, tree2.rson, depth+1 , id<<1 |1 , total) if res != -1 { return res } } return -1 } var weight_A = [][]byte {[]byte ("\x00" ), []byte ("\x01" ), []byte ("\x02" ), []byte ("\x03" ), []byte ("\x04" ), []byte ("\x05" ), []byte ("\x06" ), []byte ("\x07" ), []byte ("\x08" ), []byte ("\x09" ), []byte ("\x0a" ), []byte ("\x0b" ), []byte ("\x0c" ), []byte ("\x0d" ), []byte ("\x0e" ), []byte ("\x0f" )}var weight_B = [][]byte {[]byte ("\x00" ), []byte ("\x01" ), []byte ("\x03" ), []byte ("\x03" ), []byte ("\x04" ), []byte ("\x05" ), []byte ("\x06" ), []byte ("\x07" ), []byte ("\x08" ), []byte ("\x09" ), []byte ("\x0a" ), []byte ("\x0b" ), []byte ("\x0c" ), []byte ("\x0d" ), []byte ("\x0e" ), []byte ("\x0f" )}func MerkleTree_test () var Aroot = build(0 , 1 , 4 , weight_A) var Broot = build(0 , 1 , 4 , weight_B) fmt.Printf("%s\n" , hex.EncodeToString(Aroot.Data)) fmt.Printf("%s\n" , hex.EncodeToString(Broot.Data)) fmt.Printf("%d\n" , compareMerkleTree(Aroot, Broot, 0 , 1 , 4 )) }
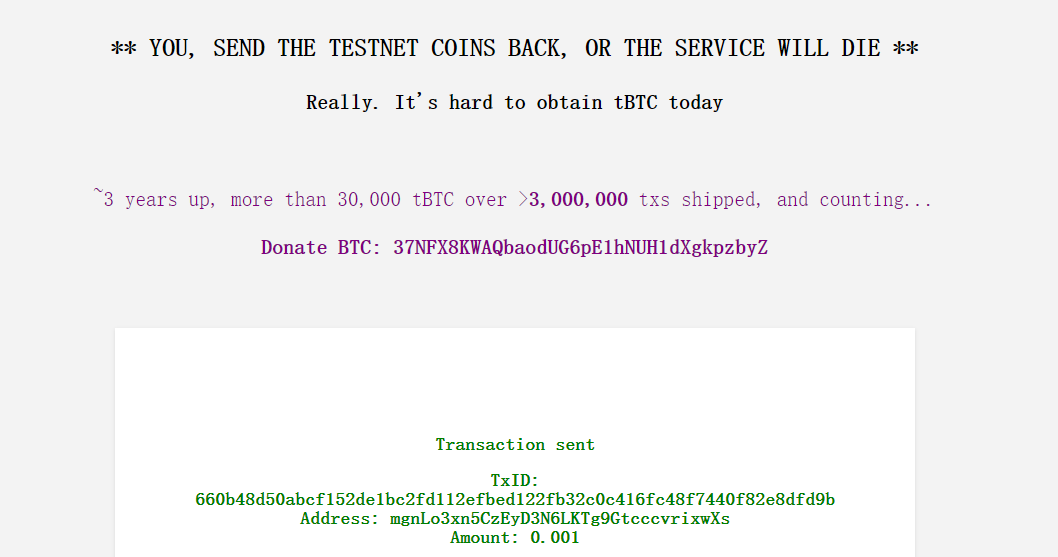
拓展实验 挖矿,用自己的学号当种子算私钥,然后再算公钥,再用第二份算地址的代码算base58,如果里面包含ccc的子串,那就提交到网址,获取小额测试用比特币。
1
2
3
4
5
6
7
8
9
10
11
12
13
14
15
16
17
18
19
20
21
22
23
24
25
26
27
28
29
30
31
32
33
34
35
36
37
38
39
40
41
42
43
44
45
46
47
48
49
50
package mainimport ( "crypto/ecdsa" "crypto/elliptic" "encoding/hex" "fmt" "math/rand" "strings" ) var src = rand.New(rand.NewSource(xxxx))func RandStringBytesMaskImprSrc (n int ) string b := make ([]byte , (n+1 )/2 ) if _, err := src.Read(b); err != nil { panic (err) } return hex.EncodeToString(b)[:n] } func newKeyPair () (ecdsa.PrivateKey,[]byte ) curve :=elliptic.P256() private,err :=ecdsa.GenerateKey(curve,strings.NewReader(RandStringBytesMaskImprSrc(50 ))) if err !=nil { fmt.Println("error" ) } pubkey :=append (private.PublicKey.X.Bytes(),private.PublicKey.Y.Bytes()...) return *private,pubkey } func Checkccc (src string ) bool length := len (src) for i := 0 ; i < length - 2 ; i++ { if src[i] == 'c' && src[i + 1 ] =='c' && src[i + 2 ] =='c' { return true } } return false } func MineCracker_test () for { privatekey,public :=newKeyPair() address := getAddress(public) if Checkccc(address) == true { fmt.Printf("%x\n" ,privatekey.D.Bytes()) fmt.Printf("%s\n" ,hex.EncodeToString(public)) fmt.Printf("%s\n" , address) break } } }
在生成随机数环节费劲了一些周折,GenerateKey的第二个参数要求是io.reader类型,正好能对应上crypto/rand里的rand.reader函数,但可惜crypto/rand无法设置种子。math/rand可以设置种子,但是我们需要找到一个能对接上io.reader的rand函数填充进去。经过我不懈的努力,使劲的读go里面ecdsa的源码,了解到了这里面是从一个熵源中不断获取字节串然后转为私钥,所以我们需要生成一个生成足够长字符串的函数,然后利用strings.NewReader这个函数转化为输入流,即io.reader,源码中对字节串长度要求是50,所以我们生成一个长度为50的字符串即可。
以下是我的私钥和公钥
1
2
3
6969695c49dcc6b9871b1d65838faceb4727bb1ffa7b3a621b47fadf265d2b368 62d3a4bfe04b3d36356ca63ae50c50696e2c3bb366eae2f5349b0eda1bcf54b29288153f70581ab5dd7b0ed963998b7c0526eb93743d72f842768d50baee0372 mgnLo3xn5CzEyD3N6LKTg9GtcccvrixwXs
存疑一 :我不知道公钥是啥格式,我这是128长度的,之前文件的样例是66长度的,是压缩公钥形式,具体形式待向助教求证。
存疑二: 用的是GO库里自带的P256曲线,别名是 secp256r1,好像应该用secp256k1??
此为我领取成功的截图。
挖到了人生第一枚币!虽然是测试用的。
经过助教核实,公钥就要33字节的,于是我又花了一上午往我的goroot下安装第三方库,跑到go的官方文档去找到了
https://pkg.go.dev/github.com/BSNDA/PCNGateway-Go-SDK/pkg/util/crypto/secp256k1#pkg-variables,有我们熟悉的函数,接口可以直接对接。
至于压缩公钥的,有这个https://pkg.go.dev/github.com/decred/dcrd/dcrec/secp256k1#section-readme,但可惜调用不了,还有C的底层代码,懒得去装了,直接手写了一个压缩公钥的(又是特别丑的代码
为了彻底跑通这个代码还去补充了这个第三方库https://github.com/pkg/errors/blob/master/errors.go
把第三方库装齐了之后终于能跑通啦,这是全新的代码:
1
2
3
4
5
6
7
8
9
10
11
12
13
14
15
16
17
18
19
20
21
22
23
24
25
26
27
28
29
30
31
32
33
34
35
36
37
38
39
40
41
42
43
44
45
46
47
48
49
50
51
52
53
54
55
56
57
58
59
60
61
62
63
64
package mainimport ( "bytes" "crypto/ecdsa" "encoding/binary" "encoding/hex" "fmt" "github.com/BSNDA/PCNGateway-Go-SDK/pkg/util/crypto/secp256k1" "math/rand" "strings" ) var src = rand.New(rand.NewSource(xxxxxxxx))func RandStringBytesMaskImprSrc (n int ) string b := make ([]byte , (n+1 )/2 ) if _, err := src.Read(b); err != nil { panic (err) } return hex.EncodeToString(b)[:n] } func BytesToInt (b []byte ) int bytesBuffer := bytes.NewBuffer(b) var x int32 binary.Read(bytesBuffer, binary.BigEndian, &x) return int (x) } func secp256 () (ecdsa.PrivateKey,[]byte ) curve := secp256k1.SECP256K1() privKey, err := ecdsa.GenerateKey(curve, strings.NewReader(RandStringBytesMaskImprSrc(50 ))) if err !=nil { fmt.Println("error" ) } Y := hex.EncodeToString(privKey.PublicKey.Y.Bytes()) length := len (Y) var pubKey []byte if Y[length - 1 ] % 2 == 1 { pubKey = append ([]byte ("\x03" ),privKey.PublicKey.X.Bytes()...) } else { pubKey = append ([]byte ("\x02" ),privKey.PublicKey.X.Bytes()...) } return *privKey, pubKey } func Checkccc (src string ) bool length := len (src) for i := 0 ; i < length - 2 ; i++ { if src[i] == 'c' && src[i + 1 ] =='c' && src[i + 2 ] =='c' { return true } } return false } func MineCracker_test () for { privatekey,public :=secp256() address := getAddress(public) if Checkccc(address) == true { fmt.Printf("%x\n" ,privatekey.D.Bytes()) fmt.Printf("%s\n" ,hex.EncodeToString(public)) fmt.Printf("%s\n" , address) break } } }
改了个seed,挖到了地址,提交,成功获得0.001测试币,这次我真的拿到私钥了,这次绝对能用了。
1
2
3
326138383534xxxxxxxxxxxxxxxxxxxxxxxxxxxxxxxxxxxxxxxxxxxxxxxxxxxx(私钥保密 038301a3c40bea42c622ecbeb453900aaad4124397993d2282781b4f2a5c32410d mwaXcViKVmtYHomvL7eHh9pncccPtyyHrb
队友s0uthwood推荐的另外一种装secp256k1更方便的方法:https://blog.csdn.net/lancefox/article/details/107321807
Week2 因为疫情重庆比赛计划被学校拦了,心态炸裂。
实验 构建区块 不得不说实验设计的是真的好,手把手教学。
这一个实验就让你写几行代码,一个区块要维护的信息有:时间戳,数据块,前一节点哈希,还有自身哈希,自身哈希由前三个计算得来,所以我们只需要把前三个拼起来算个哈希即可。
1
2
3
4
5
6
7
8
9
10
11
12
13
14
15
16
17
18
19
20
21
22
23
24
package mainimport ( "crypto/sha256" "time" ) type Block struct { Time int64 Data []byte PrevHash []byte Hash []byte } func NewBlock (data string , prevHash []byte ) *Block block := &Block{time.Now().Unix(), []byte (data), prevHash, []byte {}} block.SetHash() return block } func (b *Block) SetHash () Hash := sha256.Sum256(append (append (b.PrevHash, IntToHex(b.Time)...), b.Data...)) b.Hash = Hash[:] }
测试代码:
1
2
3
4
5
6
7
func block_test () block := NewBlock("Genesis Block" , []byte {}) fmt.Printf("Prev. hash: %x\n" , block.PrevHash) fmt.Printf("Time: %s\n" , time.Unix(block.Time, 0 ).Format("2006-01-02 15:04:05" )) fmt.Printf("Data: %s\n" , block.Data) fmt.Printf("Hash: %x\n" , block.Hash) }
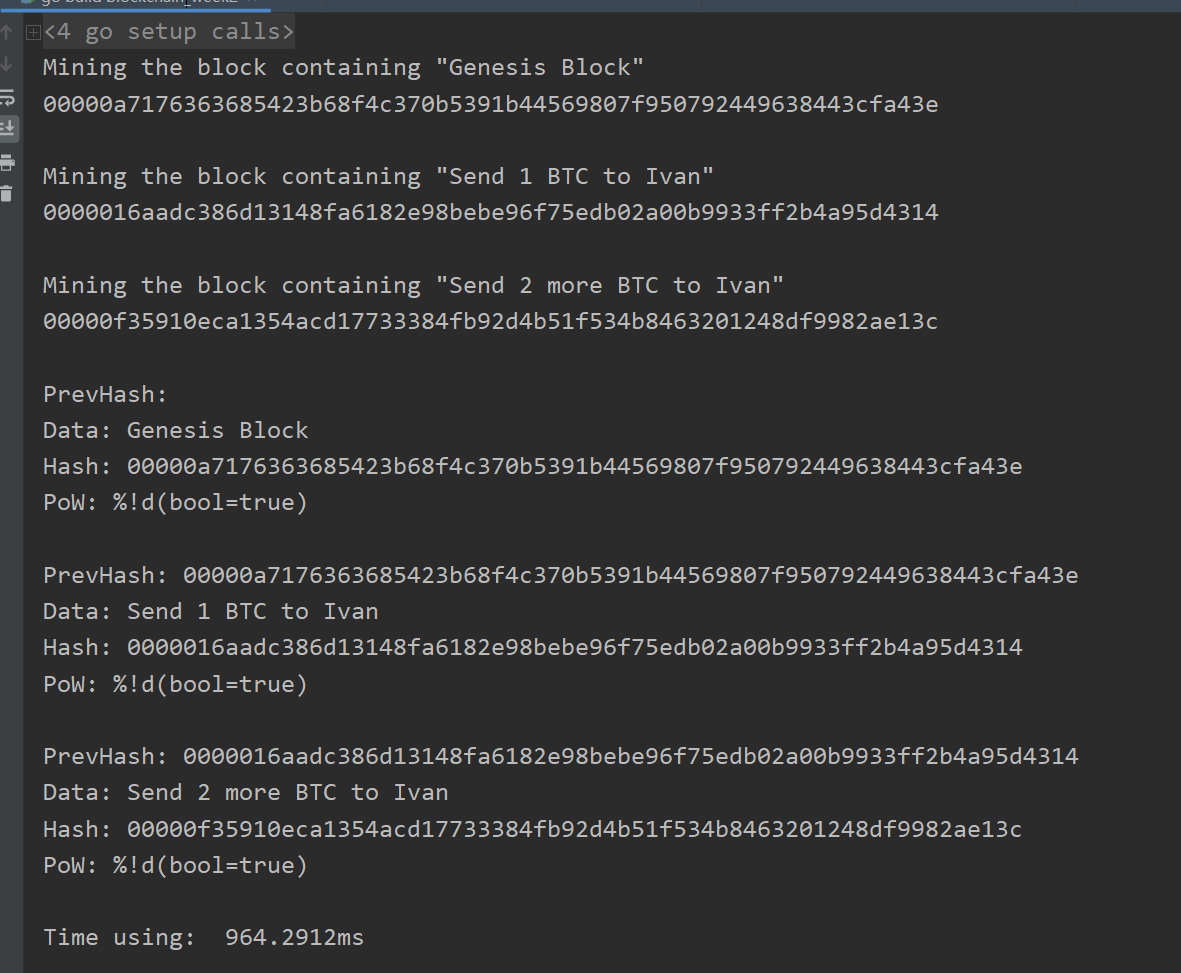
输出成功截图
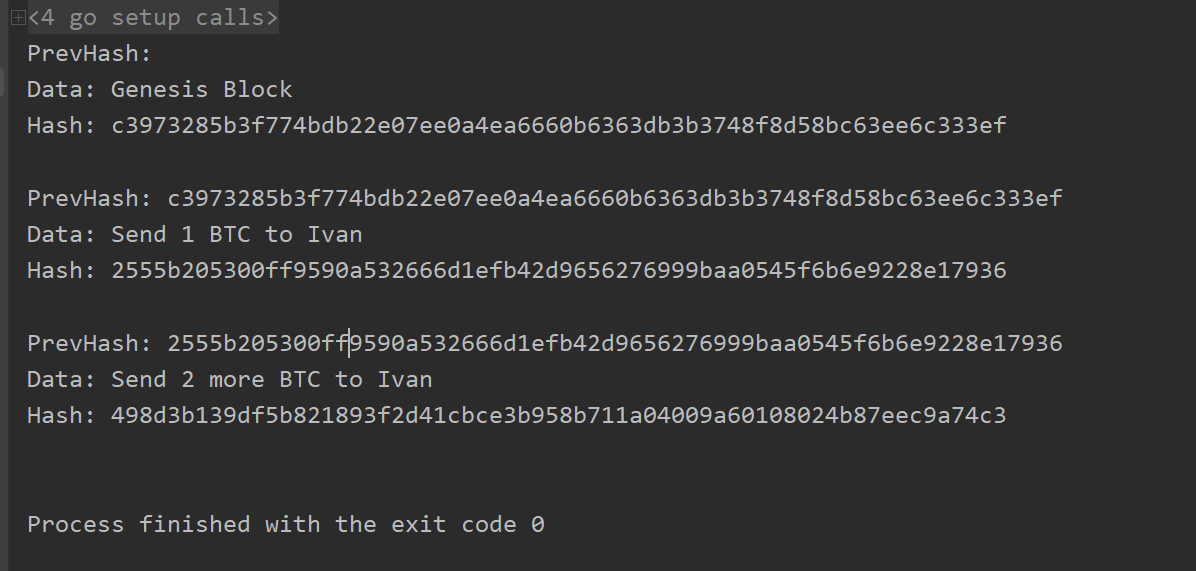
实现一条链 这个就是字面意思,实现一个创世链头,实现一个往尾部插的函数,就结束了。
1
2
3
4
5
6
7
8
9
10
11
12
13
14
15
16
17
18
19
20
package maintype Blockchain struct { blocks []*Block } func (bc *Blockchain) AddBlock (data string ) Hash := bc.blocks[len (bc.blocks) - 1 ].Hash block := NewBlock(data, Hash) bc.blocks = append (bc.blocks, block) } func NewGenesisBlock () *Block return NewBlock("Genesis Block" , []byte ("" )) } func NewBlockchain () *Blockchain return &Blockchain{[]*Block{NewGenesisBlock()}} }
实验截图:
添加工作量证明模块 这个对区块计算哈希的方法进行了修改,新增了区块中nonce的属性,然后time和data的顺序都有变化,但我们不必到block.go里修改,因为这里的prepareData函数已经帮我们拼好了,我们只需要对这个函数的返回值算哈希就好了。
然后在Run这个函数的时候,我们就把nonce从0开始加,每次新算一遍hash,如果转成BigInt如果小于$2^{236}$就表示前20位为0了,工作量证明完毕,区块可以进行添加。
1
2
3
4
5
6
7
8
9
10
11
12
13
14
15
16
17
18
19
20
21
22
23
24
25
26
27
28
29
30
31
32
33
34
35
36
37
38
39
40
41
42
43
44
45
46
47
48
49
50
51
52
53
54
55
56
57
58
59
60
61
62
63
64
65
66
67
68
package mainimport ( "bytes" "crypto/sha256" "fmt" "math/big" ) const targetBits = 20 type ProofOfWork struct { block *Block target *big.Int } func NewProofOfWork (b *Block) *ProofOfWork target := big.NewInt(1 ) target.Lsh(target, uint (256 -targetBits)) pow := &ProofOfWork{b, target} return pow } func (pow *ProofOfWork) prepareData (nonce int64 ) []byte data := bytes.Join( [][]byte { pow.block.PrevHash, pow.block.Data, IntToHex(pow.block.Time), IntToHex(int64 (targetBits)), IntToHex(nonce), }, []byte {}, ) return data } func (pow *ProofOfWork) Run () (int64 , []byte ) var hashInt big.Int var hash [32 ]byte var nonce int64 nonce = 0 fmt.Printf("Mining the block containing \"%s\"\n" , pow.block.Data) for { here := pow.prepareData(nonce) hash = sha256.Sum256(here) hashInt.SetBytes(hash[:]) if hashInt.Cmp(pow.target) < 0 { break } nonce += 1 } fmt.Printf("\r%x" , hash) fmt.Print("\n\n" ) return nonce, hash[:] } func (pow *ProofOfWork) Validate () bool var hashInt big.Int hashInt.SetBytes(pow.block.Hash) if hashInt.Cmp(pow.target) < 0 { return true } return false }
同时区块部分代码修改, 重点在于SetHash,要经过一段时间的计算。
1
2
3
4
5
6
7
8
9
10
11
12
13
14
15
16
17
18
type Block struct { Time int64 Data []byte PrevHash []byte Hash []byte Nonce int64 } func NewBlock (data string , prevHash []byte ) *Block block := &Block{time.Now().Unix(), []byte (data), prevHash, []byte {}, 0 } block.SetHash() return block } func (b *Block) SetHash () pow := NewProofOfWork(b) b.Nonce, b.Hash = pow.Run() }
阅读代码:添加数据库 1 2 3 4 5 6 7 8 9 10 11 12 13 14 15 16 17 18 19 20 21 22 23 24 25 26 27 28 29 30 31 32 33 34 35 36 package mainimport ( "fmt" "github.com/boltdb/bolt" ) type Blockchain_in_dbIterator struct { currentHash []byte db *bolt.DB } func (bc *Blockchain_in_db) Iterator () *Blockchain_in_dbIterator bci := &Blockchain_in_dbIterator{bc.tip, bc.db} return bci } func (i *Blockchain_in_dbIterator) Next () *Block var block *Block err := i.db.View(func (tx *bolt.Tx) error b := tx.Bucket([]byte (blocksBucket)) encodedBlock := b.Get(i.currentHash) block = DeserializeBlock(encodedBlock) return nil }) if err != nil { fmt.Println(err) } i.currentHash = block.PrevHash return block }
三个问题:
为什么需要在block类中添加Serialize()和DeserializeBlock()两个函数?他们主要做了什么?
序列化是将对象转化为字节串从而能存进数据库进行保存,而反序列化是能从字节串完全恢复出一个对象来。
描述一下NewBlockchain()和NewBlock()的执行逻辑。
打开数据库文件,检查是否存在一个区块链,若存在则创建实例, tip设置为最后一个区块hash,若不存在则创建创世区块,存进数据库,把key1设位创世块的hash,tip指向他。
Blockchain类中的tip变量是做什么用的?
tip变量定义为从数据中读取出来的变量,当存在区块链时,tip设置为读取到的最后一个区块hash;当不存在区块链时,tip设置为创世区块的 hash。实际上可以理解tip为区块链的一种标识符。
迭代器Interator是如何工作使得我们能够从数据库中遍历出区块信息的?
数据库迭代器,通过迭代器的next操作遍历整个数据库,从而做到区块的遍历。
实现命令行接口 添加两个命令行参数:
listblocks 把当前链的所有节点的信息输出newblock后跟-data 参数外加节点信息。
1 2 3 4 5 6 7 8 9 10 11 12 13 14 15 16 17 18 19 20 21 22 23 24 25 26 27 28 29 30 31 32 33 34 35 36 37 38 39 40 41 42 43 44 45 46 47 48 49 50 51 52 53 54 55 56 57 58 59 60 61 62 63 64 65 66 67 68 69 70 71 72 73 74 75 76 77 78 79 80 81 82 83 84 85 86 87 88 89 90 91 92 93 94 95 96 97 98 99 100 101 102 103 104 105 106 107 108 109 110 111 112 113 114 115 116 117 118 119 120 121 122 123 124 125 126 127 128 129 130 131 132 133 134 135 136 137 138 139 140 141 142 143 144 145 146 147 148 149 150 151 152 153 154 155 156 package mainimport ( "flag" "fmt" "github.com/boltdb/bolt" "log" "os" "strconv" ) const dbFile = "Blockchain_in_db_demo.db" const blocksBucket = "blocks" type Blockchain_in_db struct { tip []byte db *bolt.DB } func (bc *Blockchain_in_db) AddBlock (data string ) var lastHash []byte err := bc.db.View(func (tx *bolt.Tx) error b := tx.Bucket([]byte (blocksBucket)) lastHash = b.Get([]byte ("l" )) return nil }) if err != nil { log.Panic(err) } newBlock := NewBlock(data, lastHash) err = bc.db.Update(func (tx *bolt.Tx) error b := tx.Bucket([]byte (blocksBucket)) err := b.Put(newBlock.Hash, newBlock.Serialize()) if err != nil { log.Panic(err) } err = b.Put([]byte ("l" ), newBlock.Hash) if err != nil { log.Panic(err) } bc.tip = newBlock.Hash return nil }) if err != nil { log.Panic(err) } } func NewBlockchain_in_db () *Blockchain_in_db fmt.Print("No existing blockchain found. creating a new one...\n" ) var tip []byte db, err := bolt.Open(dbFile, 0600 , nil ) if err != nil { log.Panic(err) } err = db.Update(func (tx *bolt.Tx) error b := tx.Bucket([]byte (blocksBucket)) if b == nil { genesis := NewGenesisBlock() b, err := tx.CreateBucket([]byte (blocksBucket)) if err != nil { log.Panic(err) } err = b.Put(genesis.Hash, genesis.Serialize()) if err != nil { log.Panic(err) } err = b.Put([]byte ("l" ), genesis.Hash) if err != nil { log.Panic(err) } tip = genesis.Hash } else { tip = b.Get([]byte ("l" )) } return nil }) bc := Blockchain_in_db{tip, db} return &bc } func blockchain_db_test () bc := NewBlockchain_in_db() bc.AddBlock("Send 1 BTC to Ivan" ) bc.AddBlock("Send 2 more BTC to Ivan" ) bci := bc.Iterator() for { block := bci.Next() fmt.Printf("Prev. hash: %x\n" , block.PrevHash) fmt.Printf("Data: %s\n" , block.Data) fmt.Printf("Hash: %x\n" , block.Hash) pow := NewProofOfWork(block) fmt.Printf("PoW: %s\n" , strconv.FormatBool(pow.Validate())) fmt.Println() if len (block.PrevHash) == 0 { break } } } func list_blocks () bc := NewBlockchain_in_db() bci := bc.Iterator() for { block := bci.Next() fmt.Printf("Prev. hash: %x\n" , block.PrevHash) fmt.Printf("Data: %s\n" , block.Data) fmt.Printf("Hash: %x\n" , block.Hash) pow := NewProofOfWork(block) fmt.Printf("PoW: %s\n" , strconv.FormatBool(pow.Validate())) fmt.Println() if len (block.PrevHash) == 0 { break } } } func Add (data string ) bc := NewBlockchain_in_db() bc.AddBlock(data) fmt.Print("Success!" ) } func cli_mode () foostr := flag.NewFlagSet("newblock" ,flag.ExitOnError) strValue := foostr.String("data" ,"string" ,"打印字符串" ) switch os.Args[1 ] { case "newblock" : foostr.Parse(os.Args[2 :]) Add(*strValue) case "listblocks" : list_blocks() default : fmt.Println("expected 'str' subcommands" ) os.Exit(1 ) } }
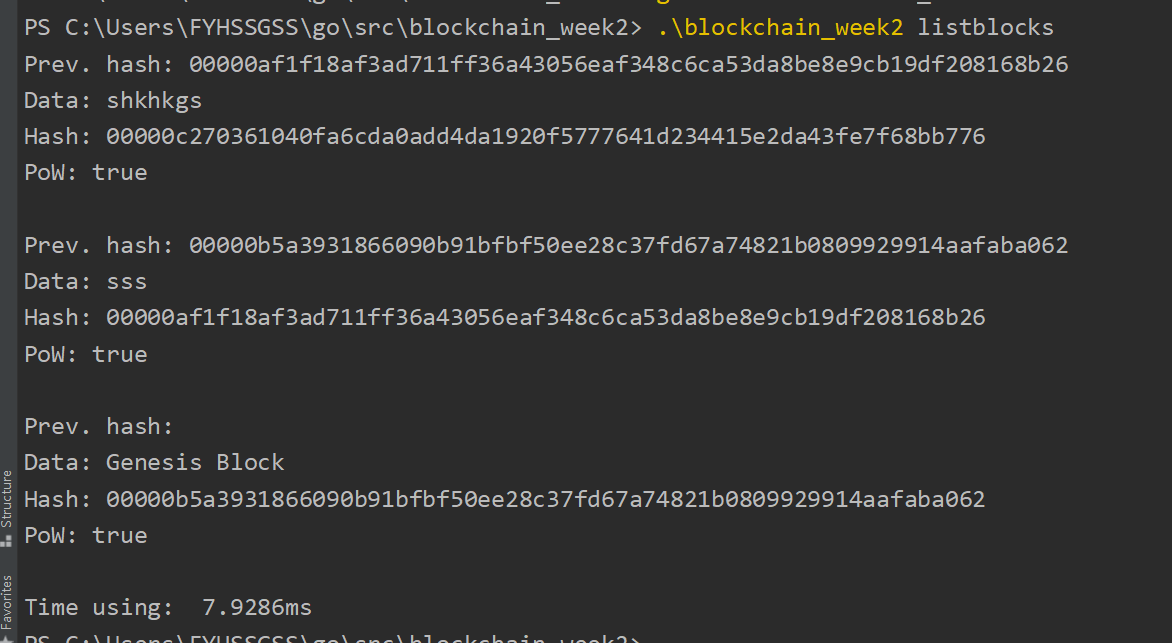
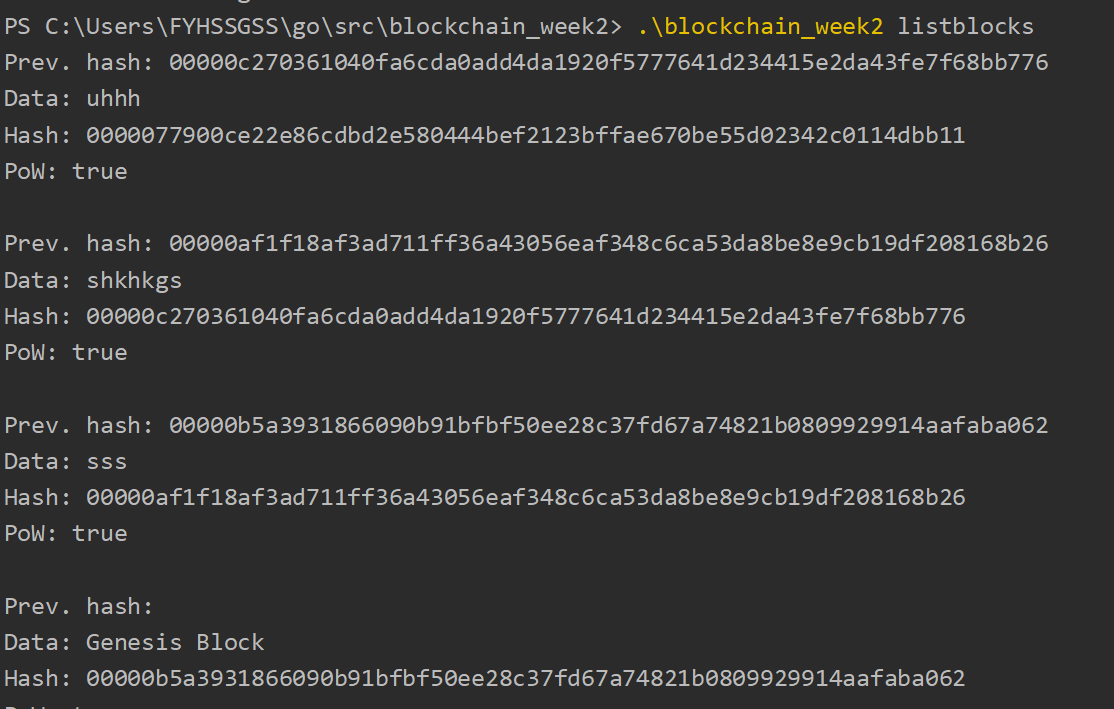
实验截图:
添加区块。
可以看到区块已经被成功添加进来。
Week3 本周开始好像就和GO语言没啥关系了,开始realworld。
但也因为个人原因,开始摆烂了,懒得做选做了。
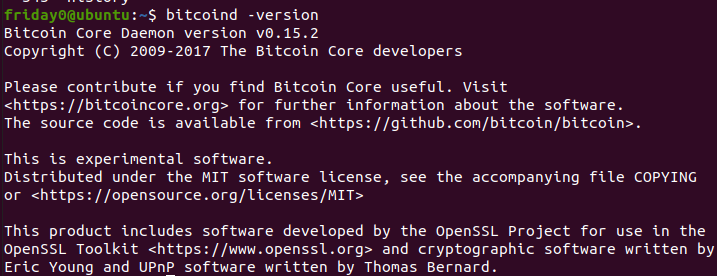
实验一 熟悉 Bitcoin Core 的基本配置方法 在Linux上安装Bitcoincore15版本,这里不推荐最新的版本,据说删除了很多对新手友好的指令。
虽然指导书上给的windows安装包,但我怕把windows装炸了,于是装在虚拟机里了。
1
2
3
4
5
6
mkdir /wallet cd /wallet wget https://bitcoincore.org/bin/bitcoin-core-0.15.2/bitcoin-0.15.2-x86_64-linux-gnu.tar.gz cd bitcoin-0.15.2/bin ln -s /wallet/bitcoin-0.15.2/bin/bitcoind /usr/bin/bitcoind ln -s /wallet/bitcoin-0.15.2/bin/bitcoin-cli /usr/bin/bitcoin-cli
成功安装好。
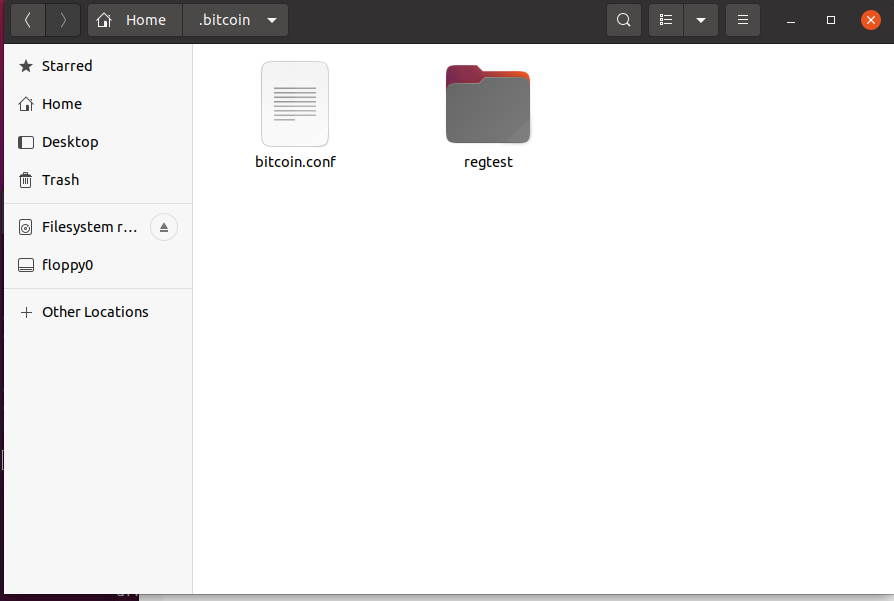
在/root/.bitcoin为默认存储数据位置,我们查看文件夹如下。
bitcoin.conf内容如下:
1
2
dir=/wallet/datadir regtest=1
最终配置的三个.conf:
1
2
3
4
5
6
7
8
9
10
regtest=1 port=22222 rpcport=18332 addnode=127.0.0.1:22224 addnode=127.0.0.1:22226 rpcuser=alice # rpc访问的password rpcpassword=8PPL3gL3gAM967mies3E= #设置rpc接口的访问密码
1
2
3
4
5
6
7
8
9
10
regtest=1 port=22224 rpcport=18334 addnode=127.0.0.1:22222 addnode=127.0.0.1:22226 rpcuser=bob # rpc访问的password rpcpassword=8PPL3gL3gAM967mies3E= #设置rpc接口的访问密码
1
2
3
4
5
6
7
8
9
regtest=1 port=22226 rpcport=18336 addnode=127.0.0.1:22222 addnode=127.0.0.1:22224 rpcuser=network rpcpassword=8PPL3gL3gAM967mies3E= #设置rpc接口的访问密码
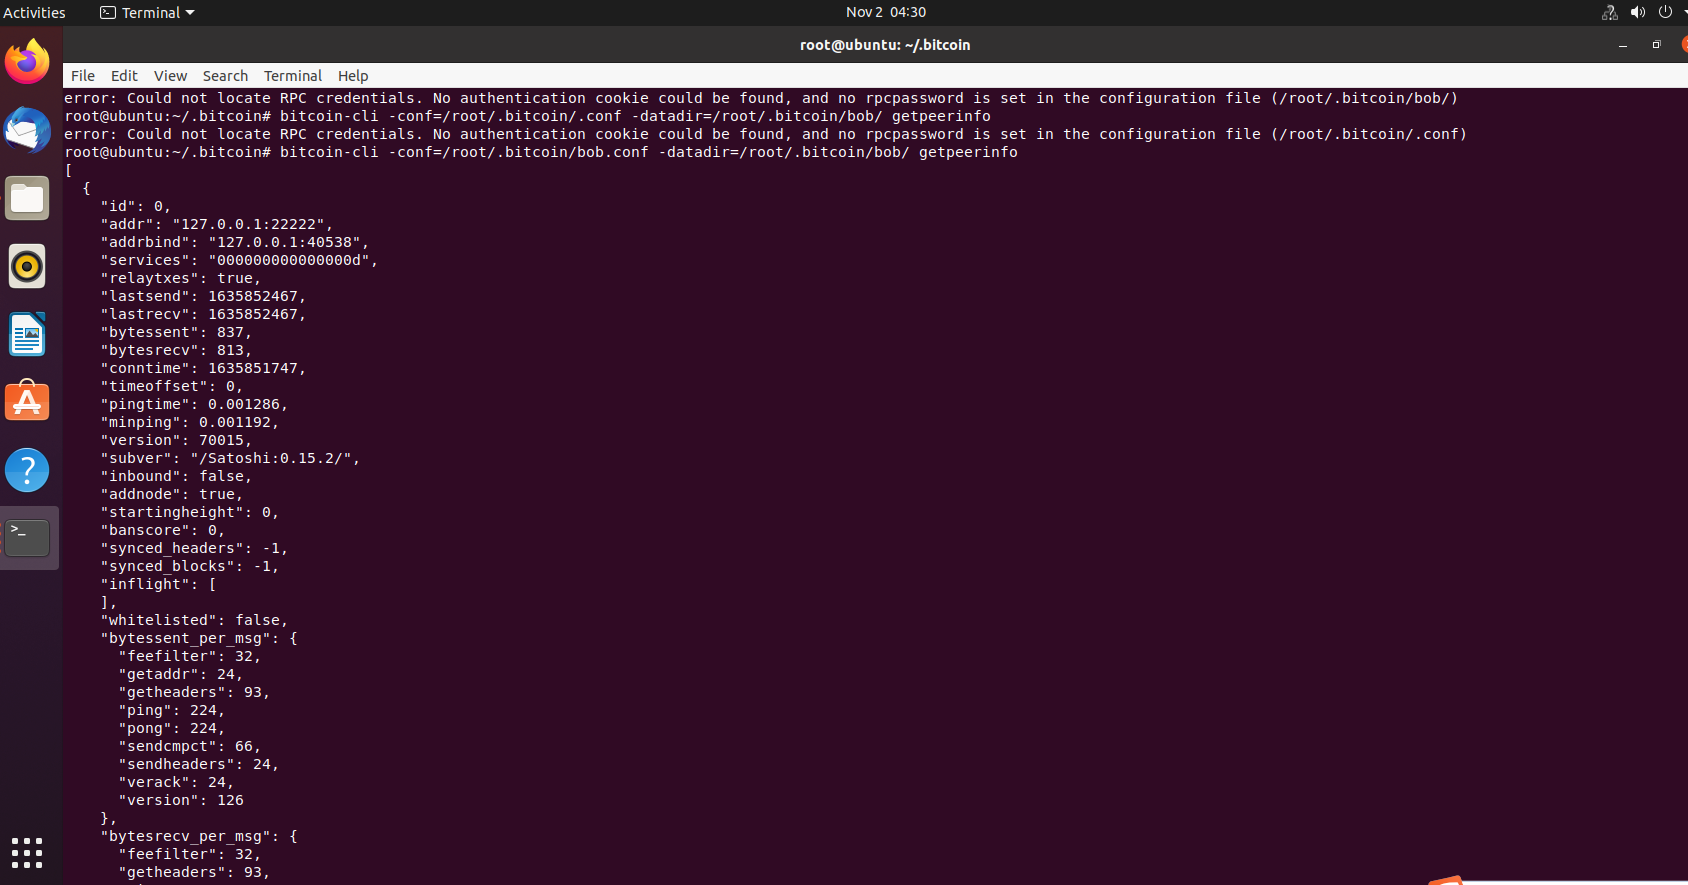
同时运行三个终端后,我们查看debug.log,可以看到一些信息
1
2
3
4
5
6
7
8
9
10
11
12
13
14
15
16
17
18
19
20
21
22
23
24
25
26
27
28
29
30
31
32
33
34
35
36
37
38
39
40
41
42
43
44
45
2021-11-02 09:14:04 * Using 2.0MiB for block index database 2021-11-02 09:14:04 * Using 8.0MiB for chain state database 2021-11-02 09:14:04 * Using 440.0MiB for in-memory UTXO set (plus up to 286.1MiB of unused mempool space) 2021-11-02 09:14:04 init message: Loading block index... 2021-11-02 09:14:04 Opening LevelDB in /root/.bitcoin/regtest/blocks/index 2021-11-02 09:14:04 Opened LevelDB successfully 2021-11-02 09:14:04 Using obfuscation key for /root/.bitcoin/regtest/blocks/index: 0000000000000000 2021-11-02 09:14:04 LoadBlockIndexDB: last block file = 0 2021-11-02 09:14:04 LoadBlockIndexDB: last block file info: CBlockFileInfo(blocks=1, size=293, heights=0...0, time=2011-02-02...2011-02-02) 2021-11-02 09:14:04 Checking all blk files are present... 2021-11-02 09:14:04 LoadBlockIndexDB: transaction index disabled 2021-11-02 09:14:04 Opening LevelDB in /root/.bitcoin/regtest/chainstate 2021-11-02 09:14:04 Opened LevelDB successfully 2021-11-02 09:14:04 Using obfuscation key for /root/.bitcoin/regtest/chainstate: 3ee9ed6c7b1f986a 2021-11-02 09:14:04 Loaded best chain: hashBestChain=0f9188f13cb7b2c71f2a335e3a4fc328bf5beb436012afca590b1a11466e2206 height=0 date=2011-02-02 23:16:42 progress=1.000000 2021-11-02 09:14:04 init message: Rewinding blocks... 2021-11-02 09:14:04 init message: Verifying blocks... 2021-11-02 09:14:04 block index 14ms 2021-11-02 09:14:04 init message: Loading wallet... 2021-11-02 09:14:04 nFileVersion = 150200 2021-11-02 09:14:04 Keys: 2002 plaintext, 0 encrypted, 2002 w/ metadata, 2002 total 2021-11-02 09:14:04 wallet 25ms 2021-11-02 09:14:04 setKeyPool.size() = 2000 2021-11-02 09:14:04 mapWallet.size() = 0 2021-11-02 09:14:04 mapAddressBook.size() = 1 2021-11-02 09:14:04 mapBlockIndex.size() = 1 2021-11-02 09:14:04 nBestHeight = 0 2021-11-02 09:14:04 Bound to [::]:18444 2021-11-02 09:14:04 Bound to 0.0.0.0:18444 2021-11-02 09:14:04 init message: Loading P2P addresses... 2021-11-02 09:14:04 Loaded 0 addresses from peers.dat 0ms 2021-11-02 09:14:04 init message: Loading banlist... 2021-11-02 09:14:04 init message: Starting network threads... 2021-11-02 09:14:04 init message: Done loading 2021-11-02 09:14:04 opencon thread start 2021-11-02 09:14:04 msghand thread start 2021-11-02 09:14:04 dnsseed thread start 2021-11-02 09:14:04 Loading addresses from DNS seeds (could take a while) 2021-11-02 09:14:04 0 addresses found from DNS seeds 2021-11-02 09:14:04 dnsseed thread exit 2021-11-02 09:14:04 torcontrol thread start 2021-11-02 09:14:04 addcon thread start 2021-11-02 09:14:04 net thread start 2021-11-02 09:14:04 Imported mempool transactions from disk: 0 successes, 0 failed, 0 expired 2021-11-02 09:15:05 Adding fixed seed nodes as DNS doesn't seem to be available.
我们可以看到:
存储链上交易状态初始化的数据空间为8Mib。
在初始化过程中,节点钱包密钥池最终保存了2000对密钥?
程序添加P2P的流程:在区块链中增加新的区块并与ip端口绑定,之后加载P2P地址,重建peers.dat和banlist.dat;启动网线程,完成加载,然后开启其他线程,寻找新鲜的更新信息,最后接受版本信息。
实验二 掌握常用 RPC 指令,利用回归测试网络实现挖矿与交易 利用 bitcoin-cli 指令实现简单的回归测试与网络挖矿及交易
由于使用的是linux,于是在.bashrc进行了alias配置,完成了命令的简化。
1
2
3
4
5
6
7
8
9
10
11
alias alice-d='bitcoind -regtest -conf=/root/.bitcoin/alice.conf -datadir=/root/.bitcoin/alice $*' alias bob-d='bitcoind -regtest -datadir=/root/.bitcoin/bob $*' alias network-d='bitcoind -regtest -datadir=/root/.bitcoin/network $*' alias alice-cli='bitcoin-cli -regtest -conf=/root/.bitcoin/alice.conf -datadir=/root/.bitcoin/alice $*' alias bob-cli='bitcoin-cli -regtest -conf=/root/.bitcoin/bob.conf -datadir=/root/.bitcoin/bob $*' alias network-cli='bitcoin-cli -regtest -conf=/root/.bitcoin/network.conf -datadir=/root/.bitcoin/network $*' alias alice-qt=bitcoin-qt -regtest -datadir=/root/.bitcoin/alice $* alias bob-qt=bitcoin-qt -regtest -datadir=/root/.bitcoin/bob $* alias network-qt=bitcoin-qt -regtest -datadir=/root/.bitcoin/network $*
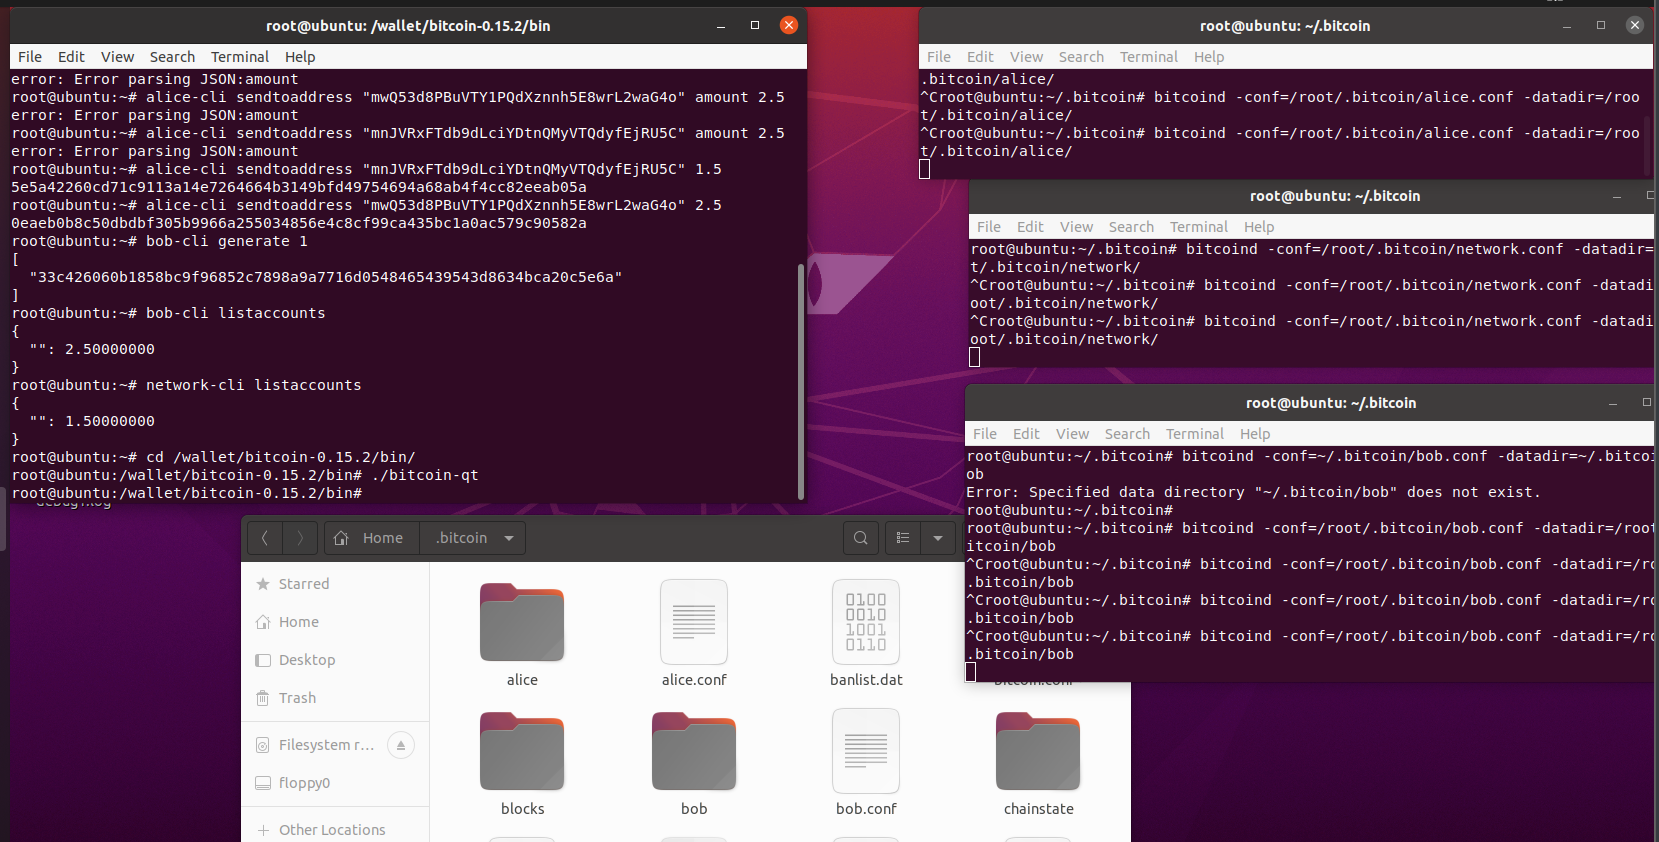
同时运行4个终端。
右边三个分别是alice,bob,network,要保证全程一直开启。
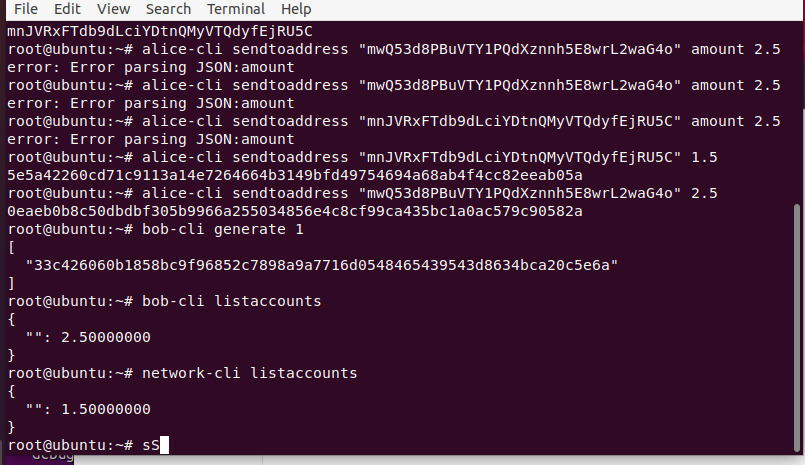
左侧的进程使用bitcoin-cli,先通过挖100次矿得到一笔巨款,然后分别查询network和bob的地址,然后支付给他俩,bob再挖一块获得确认,最后查看余额。
1
2
3
4
5
6
7
8
9
10
11
12
13
14
15
16
17
18
19
20
21
22
23
24
25
26
root@ubuntu:~# alice-cli listaccounts { "": 8750.00000000 } root@ubuntu:~# alice-cli getnewaddress mvkdP7rdB2U45R5nNJApQxfrmDrVq5HBs6 root@ubuntu:~# bob-cli getnewaddress mwQ53d8PBuVTY1PQdXznnh5E8wrL2waG4o root@ubuntu:~# network-cli getnewaddress mnJVRxFTdb9dLciYDtnQMyVTQdyfEjRU5C root@ubuntu:~# alice-cli sendtoaddress "mnJVRxFTdb9dLciYDtnQMyVTQdyfEjRU5C" 1.5 5e5a42260cd71c9113a14e7264664b3149bfd49754694a68ab4f4cc82eeab05a root@ubuntu:~# alice-cli sendtoaddress "mwQ53d8PBuVTY1PQdXznnh5E8wrL2waG4o" 2.5 0eaeb0b8c50dbdbf305b9966a255034856e4c8cf99ca435bc1a0ac579c90582a root@ubuntu:~# bob-cli generate 1 [ "33c426060b1858bc9f96852c7898a9a7716d0548465439543d8634bca20c5e6a" ] root@ubuntu:~# bob-cli listaccounts { "": 2.50000000 } root@ubuntu:~# network-cli listaccounts { "": 1.50000000 }
上述过程便是描述的全过程。
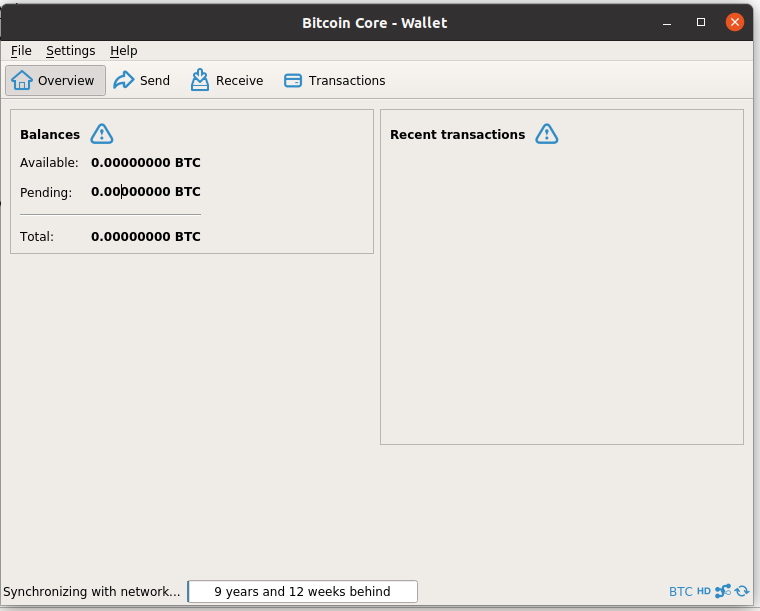
实验三 通过控制台与测试链进行更加丰富的交互 bitcoin-qt就是把刚才的操作全部变成图形化操作,这里显示的是既不是alice的,也不是bob的,所以没有显示余额。
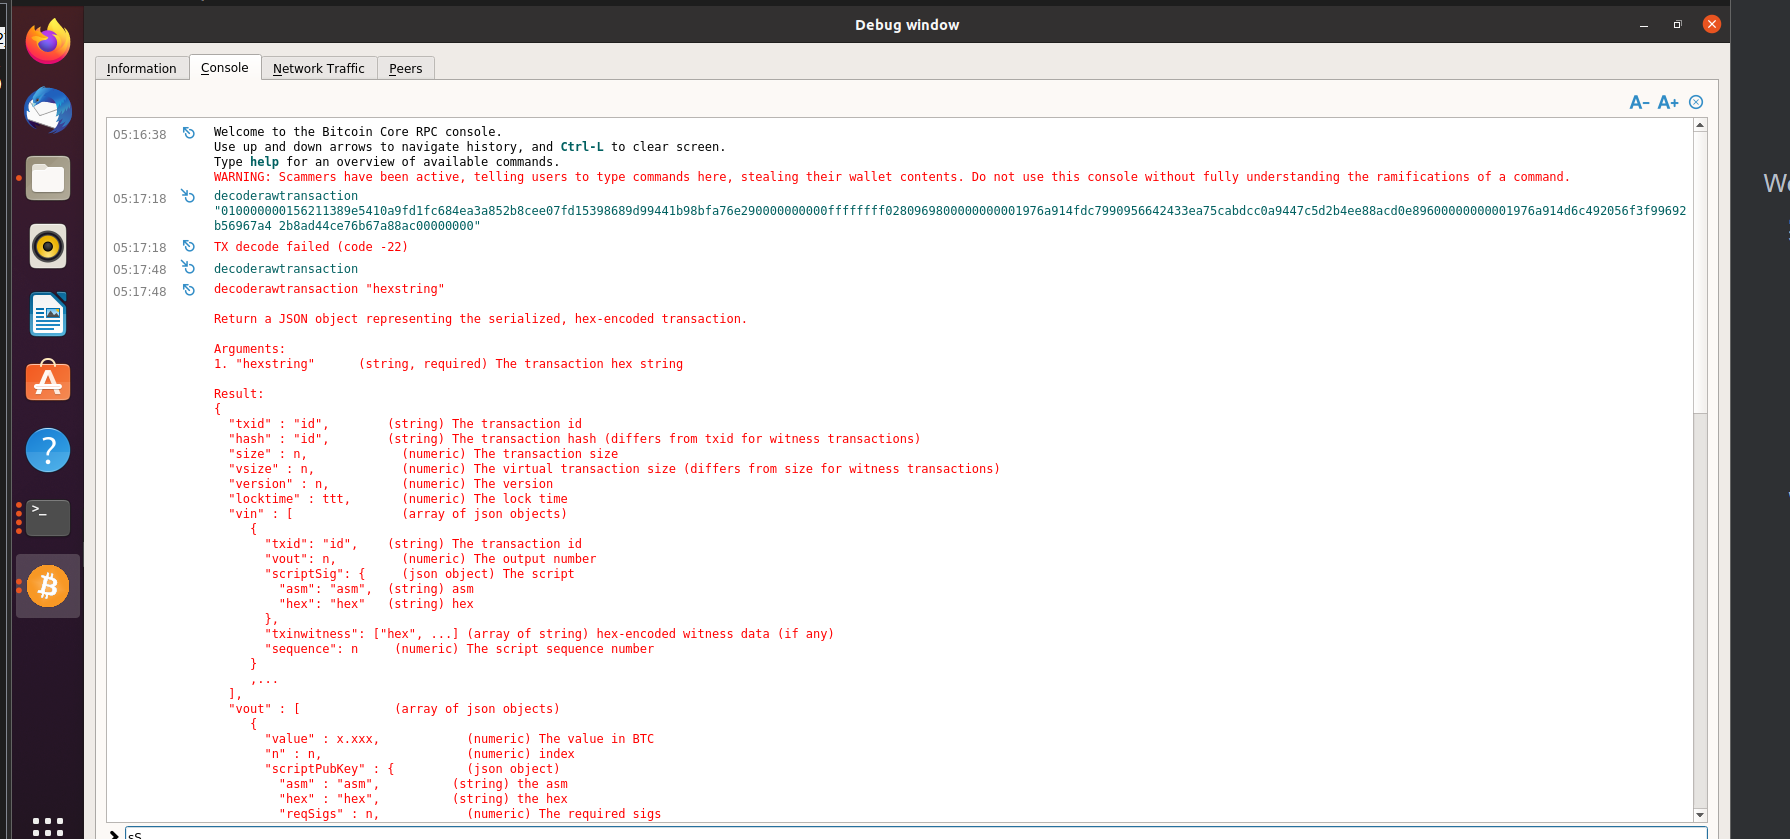
在help的debug窗口里能对json进行一个解析。
1
2
3
4
5
decoderawtransaction "010000000156211389e5410a9fd1fc684ea3a852b8cee07fd15398689d99441b 98bfa76e290000000000ffffffff0280969800000000001976a914fdc79909566 42433ea75cabdcc0a9447c5d2b4ee88acd0e89600000000001976a914d6c49205 6f3f99692b56967a42b8ad44ce76b67a88ac00000000"
可以看到,该交易的输入输出情况,输入包含交易id,交易序号,输出包含交易值,scrippubkey,有两个交易,第一个数据量大小为0.100000,另一个是0.09890000。
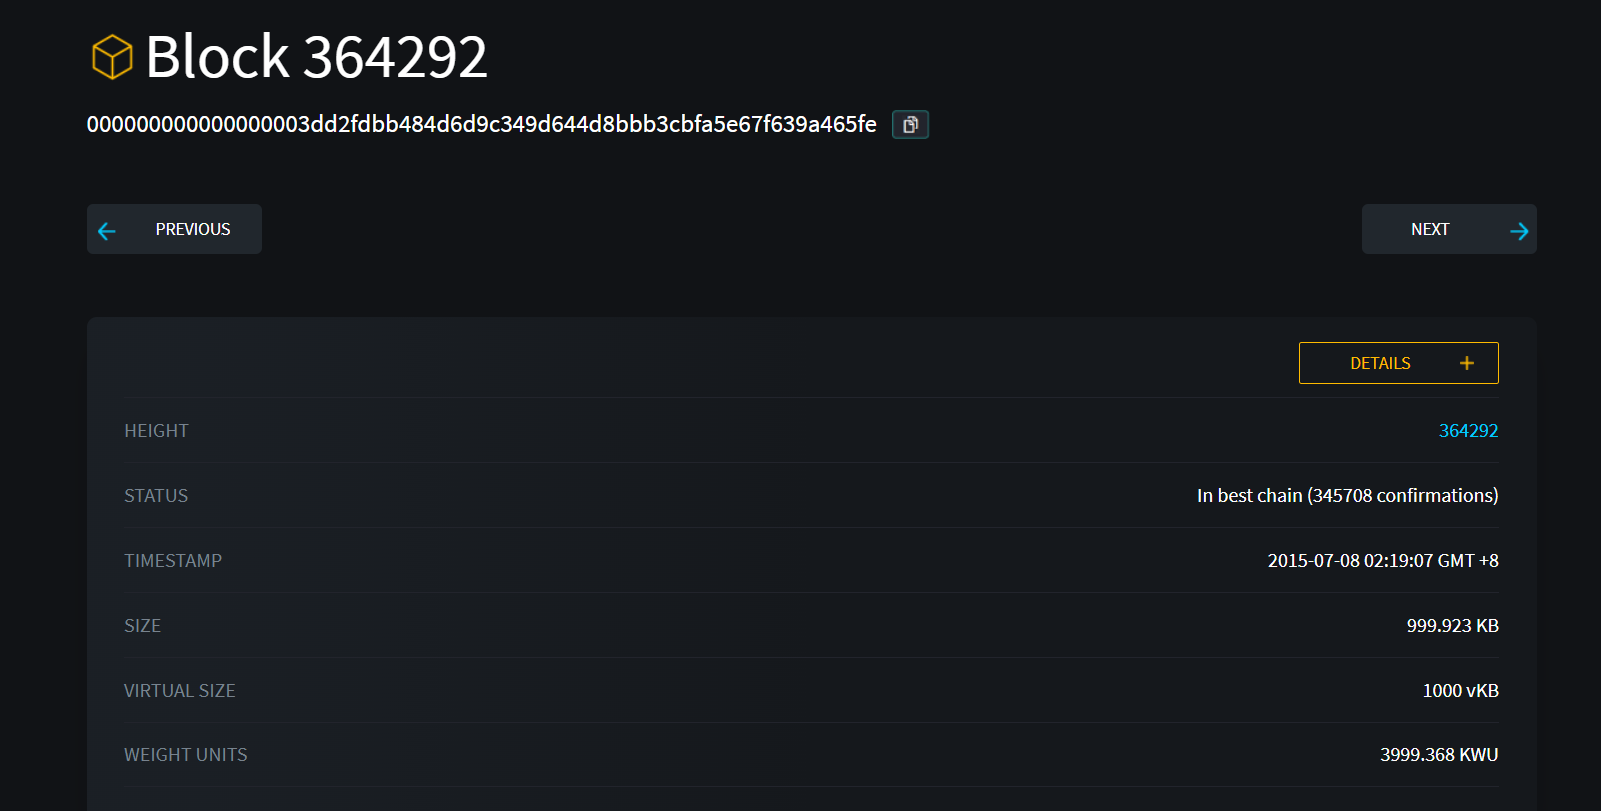
Week4 实验一 区块链浏览器的基本操作与功能 前往网站https://blockstream.info/block/000000000000000003dd2fdbb484d6d9c349d644d8bbb3cbfa5e67f639a465fe,获得了如下信息:
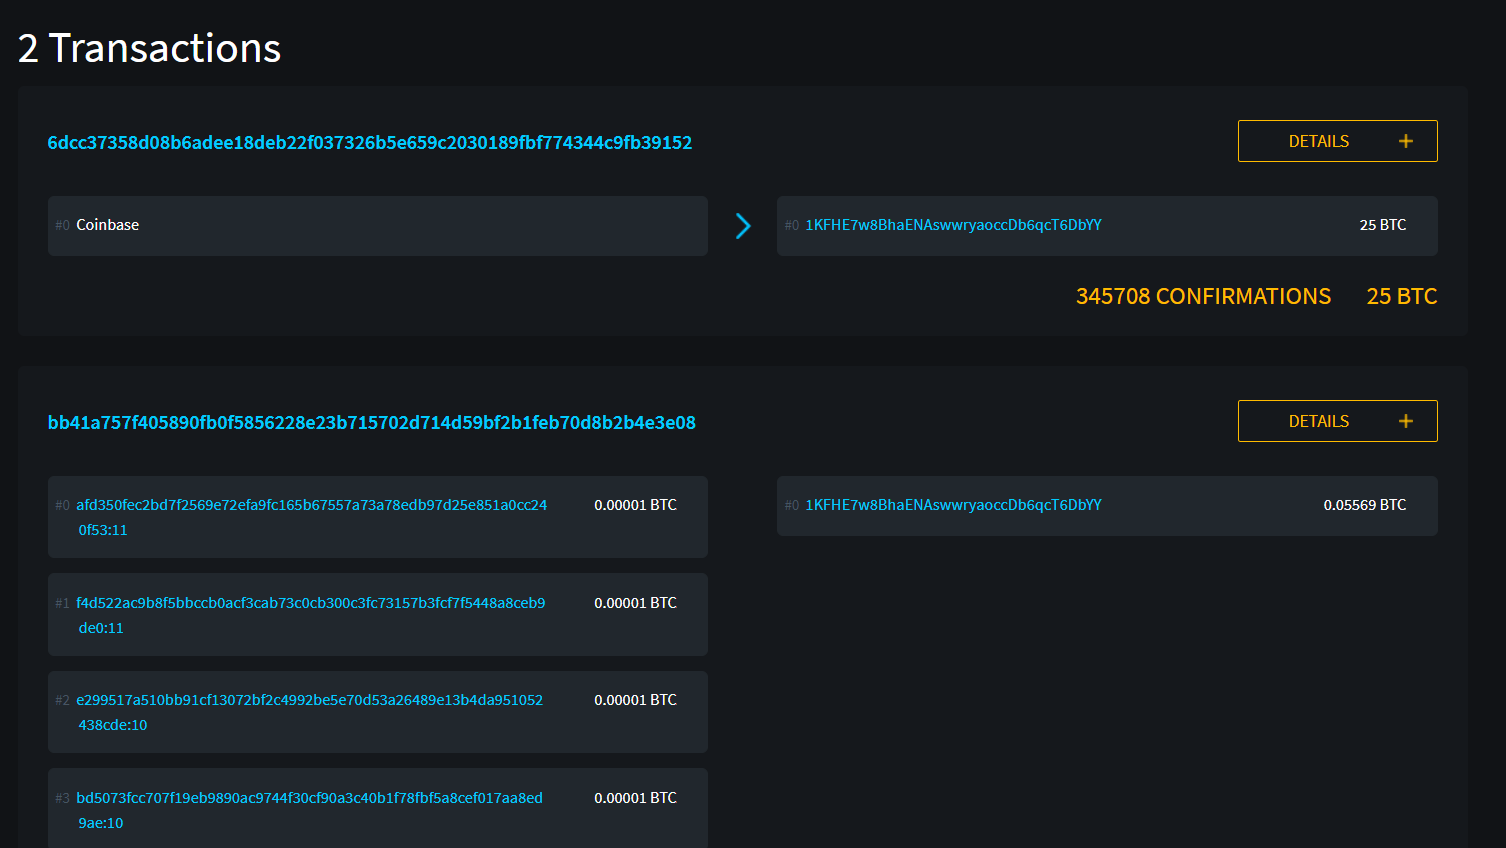
值得我们注意的是,第二个交易里每次都是0.00001BTC,一共进行了5569次,可以发现这里面存在着很多无用的垃圾交易,算是对服务器的一个DDOS攻击(类似),体现出了区块链系统在设计方面没有考虑这种价格极小,但是靠数量堆叠上去的垃圾订单,很影响服务器运行。
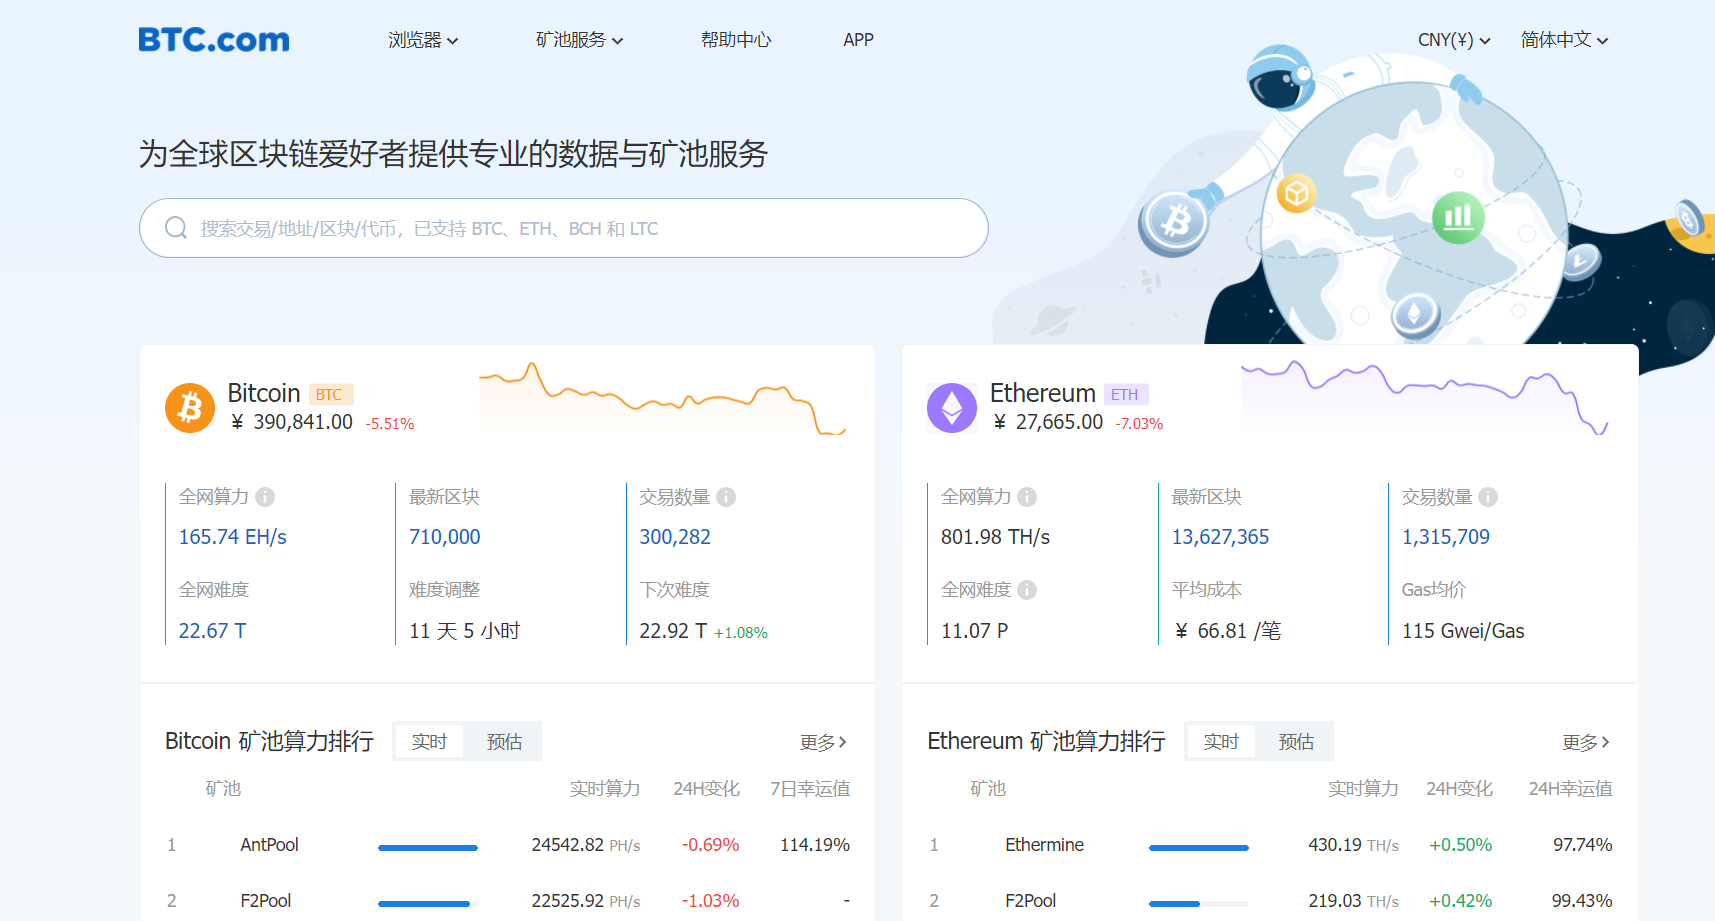
前往https://btc.com/stats/diff ,查看比特币挖矿难度变化的可视化实时结果。
难度调整的间隔是:11天5小时
难度变化趋势:整体上难度是在增加,但是中间会有波动。
带来的影响:会使计算区块越来越困难
平均算力计算:用难度除以平均出块时间
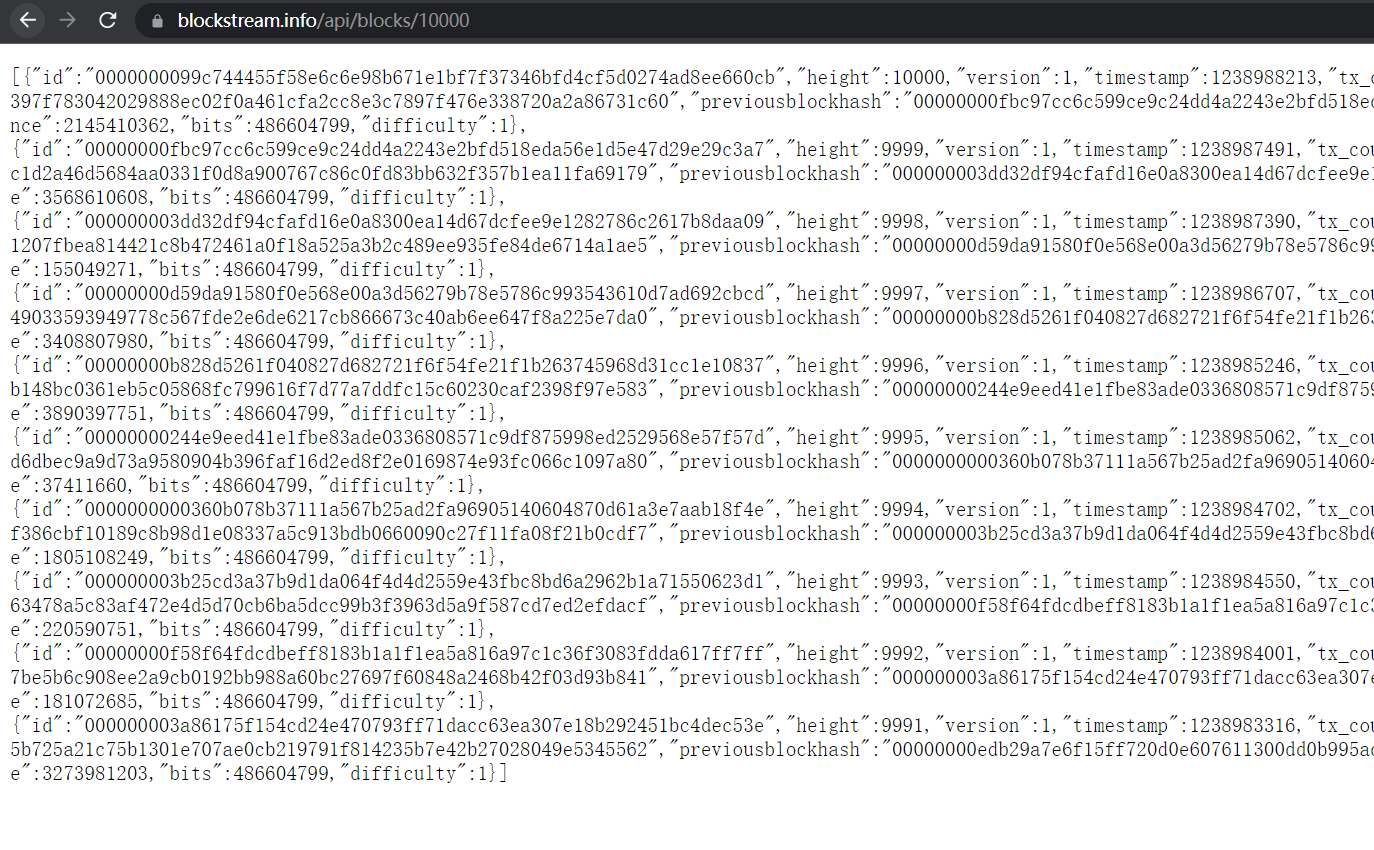
调用api
1
2
3
4
5
6
7
8
9
10
11
12
13
14
15
16
17
18
19
20
21
22
23
PS C:\Users\FYHSSGSS> curl https://blockstream.info/api/mempool StatusCode : 200 StatusDescription : OK Content : {"count":10071,"vsize":3470658,"total_fee":19003372,"fee_histogram":[[26.302326,50134],[12.983334,5 0077],[10.573426,50207],[9.985863,79877],[8.196078,50075],[7.5089393,50009],[6.0842695,50052],[5.44 14... RawContent : HTTP/1.1 200 OK Vary: Accept-Encoding Access-Control-Allow-Origin: * Access-Control-Expose-Headers: x-total-results Alt-Svc: clear Content-Length: 1159 Cache-Control: public, max-age=10 Content... Forms : {} Headers : {[Vary, Accept-Encoding], [Access-Control-Allow-Origin, *], [Access-Control-Expose-Headers, x-total -results], [Alt-Svc, clear]...} Images : {} InputFields : {} Links : {} ParsedHtml : mshtml.HTMLDocumentClass RawContentLength : 1159
分析这个json的前一小部分即可,交易数目为10071,数据量为3470658,大约3470658/1024/1024=3个区块能处理这么多交易。
高度在9991-10000间区块内包含的总交易数目为10个。
实验二 逐步分析:
初始占内有x,y,z,
第一步复制栈,得到x,y,z,x,y,zy+z,然后pushnum9然后equaly+z=9z+x=7,x+y=8x,y,z
即为:
解出来便可以写出解锁脚本。
1 op_pushnum_3 op_pushnum_5 op_pushnum_4
实验三 实验截图如下:
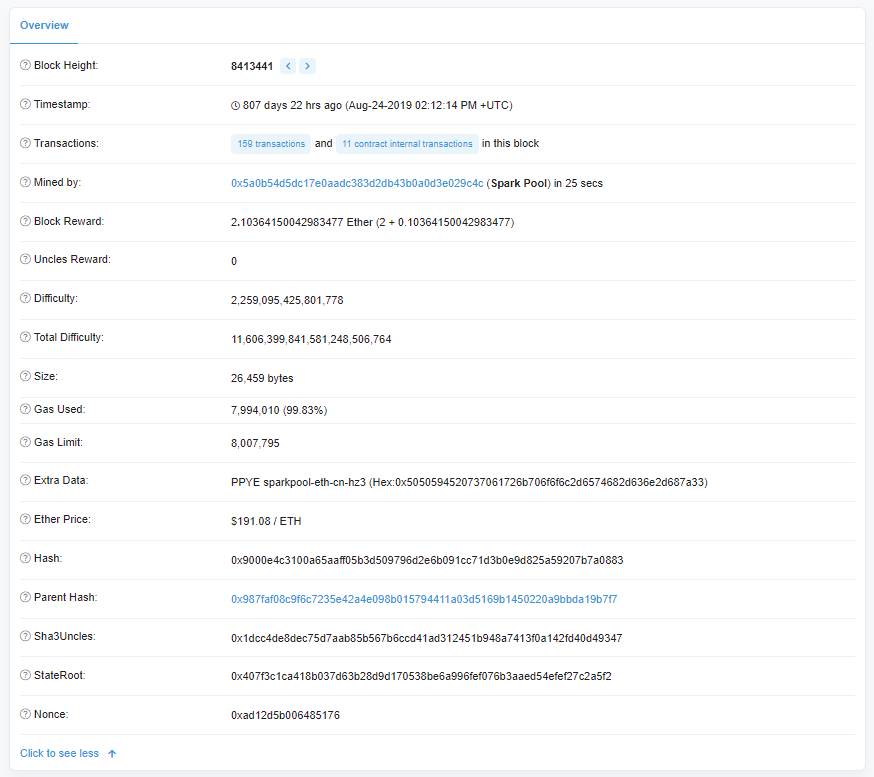
查看指定区块详情
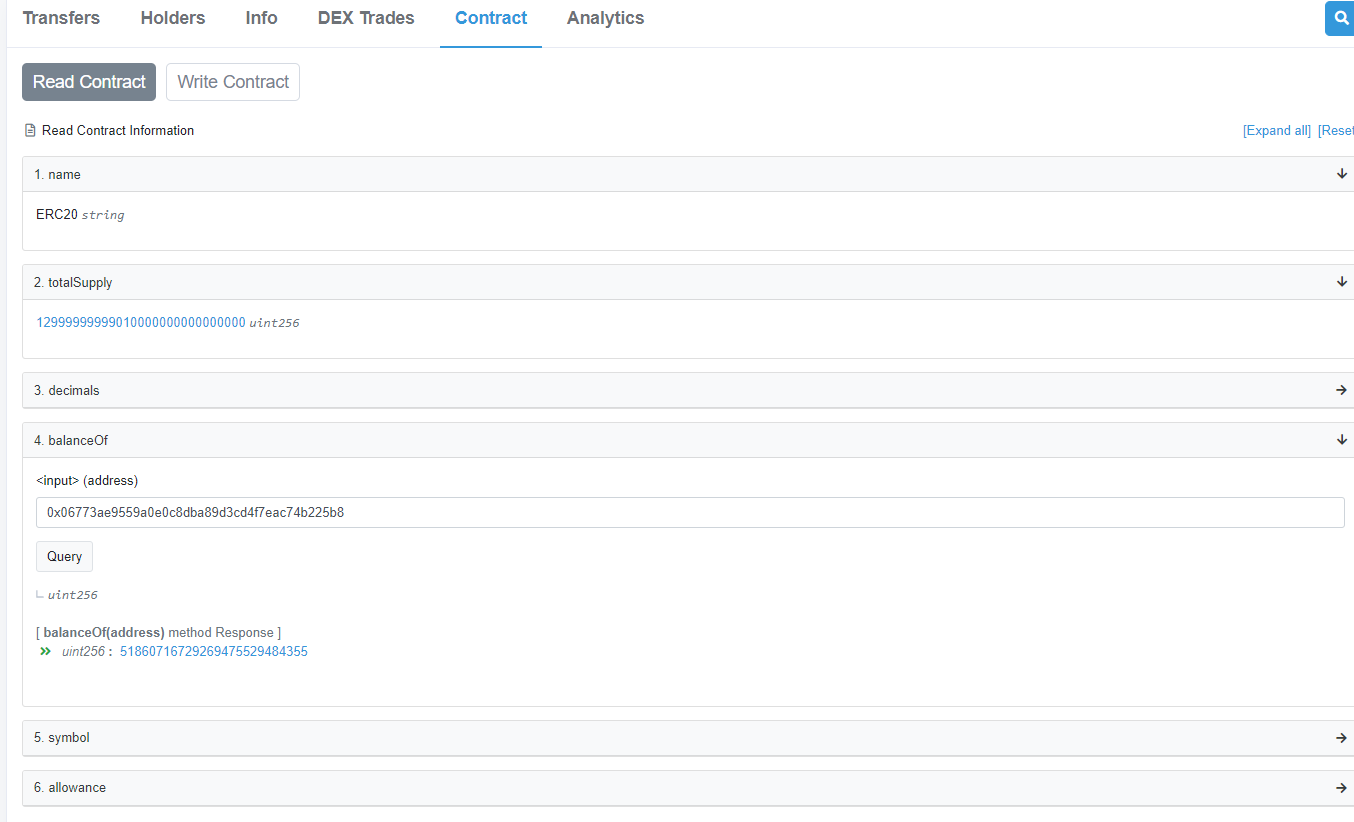
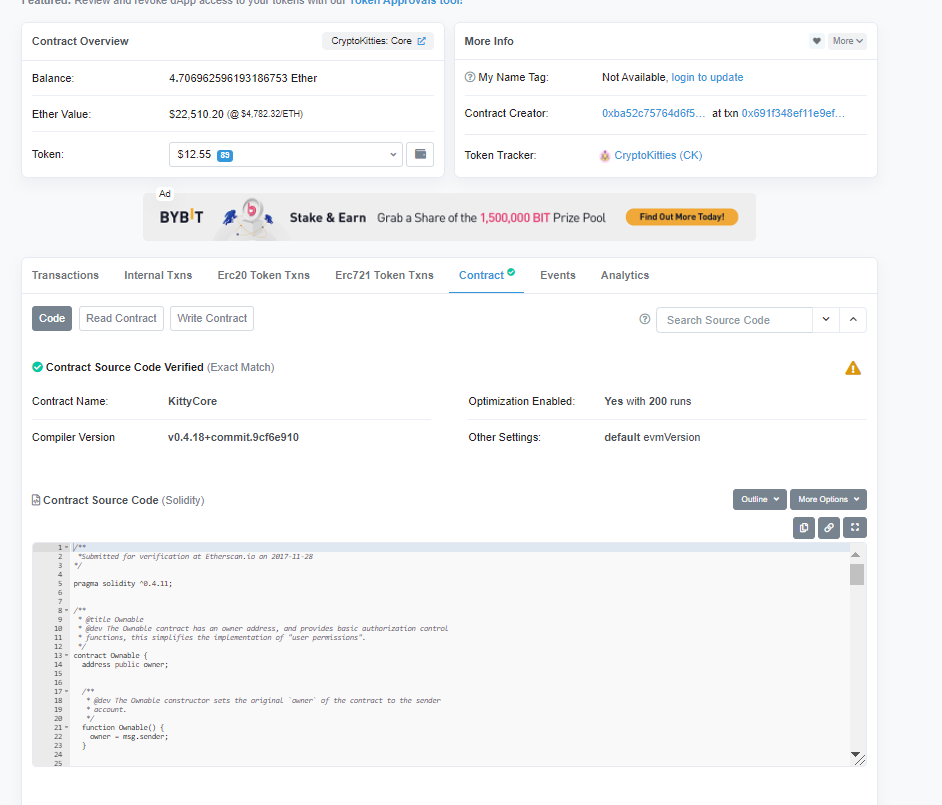
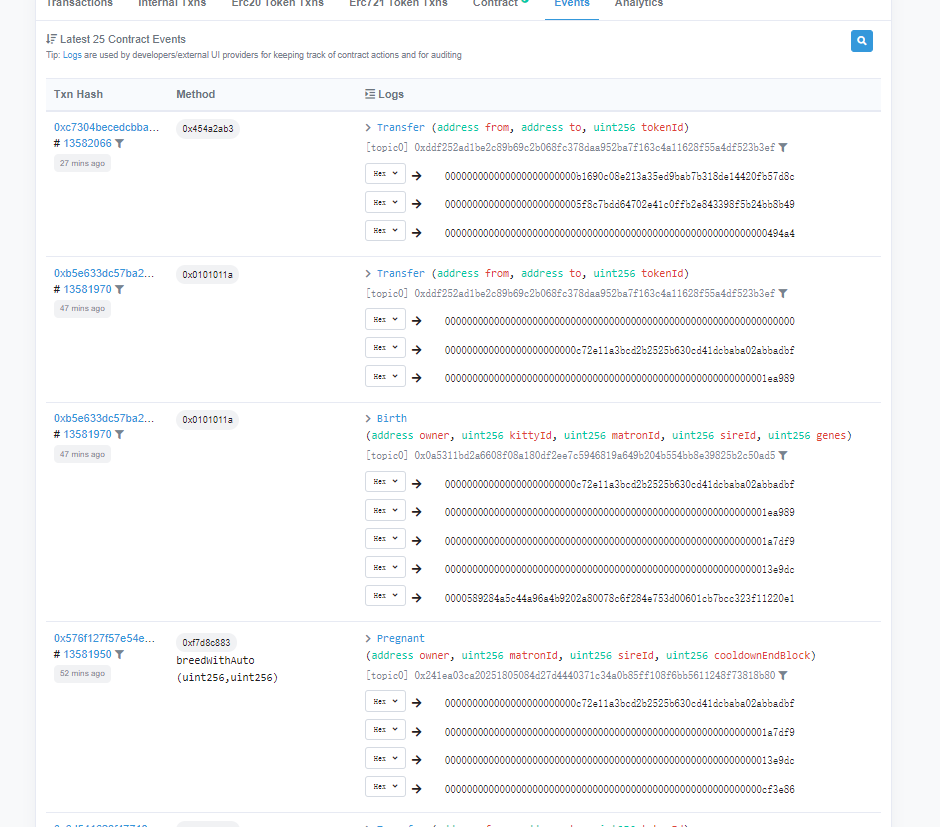
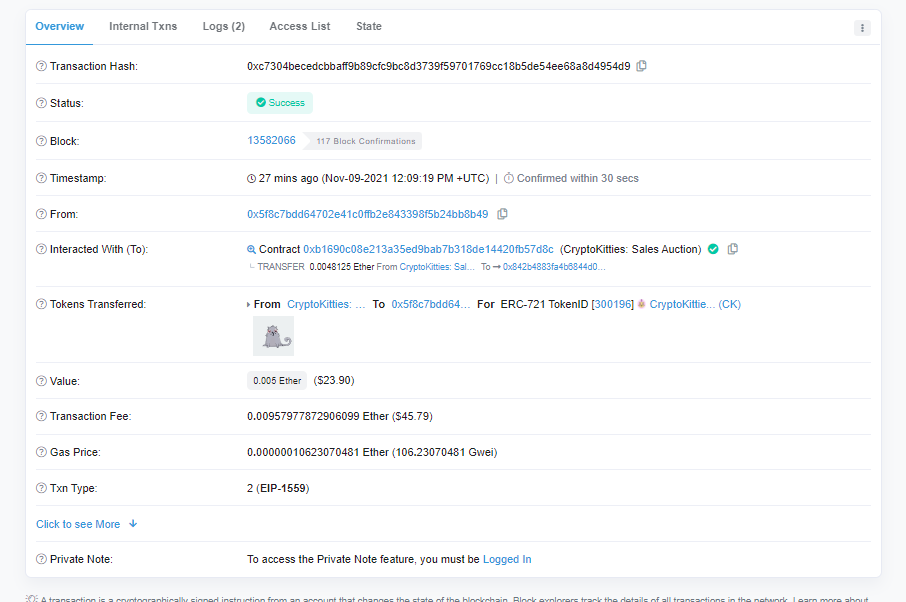
探究ERC20代币合约;
智能合约定义为一段部署在evm虚拟机中的代码,无法自动执行,需要人为的 触发才能执行,每执行一次需要发起这次执行的账户扣除对应的gas作为手续费, 智能合约与平时的代码其实没有什么区别,只是运行于一个以太坊这样的分布式 平台上而已。我们将通过下周的学习了解到如何写出自己的智能合约。
实验四 体验比特币靓号地址 简单的正则。
1
2
3
4
5
6
7
8
9
10
11
12
13
14
15
16
PS C:\Users\FYHSSGSS\Documents\University\2021autumn\blockchain\区块链实验课\实验四\实验材料\vanitygen-0.22-win> .\vanitygen.exe -r 'ccc' Pattern: ccc Address: 1PHtXF1YL9vTVN4FcccorAYny4q7W9Q2mT Privkey: 5KhRJHBQLNUjh4XGGMncydN9PaWECrMoRVFLvgmQonybbL6PFFc PS C:\Users\FYHSSGSS\Documents\University\2021autumn\blockchain\区块链实验课\实验四\实验材料\vanitygen-0.22-win> .\vanitygen.exe -r '^11.*77$' Pattern: ^11.*77$ Address: 11AXtLdPWRacsCqWbFwwUkBeuJF9DL477 Privkey: 5JeiqauTWKDjScF5w8ycFQnULKsxhQr2wWEUmDCKKrRij4NPWGZ PS C:\Users\FYHSSGSS\Documents\University\2021autumn\blockchain\区块链实验课\实验四\实验材料\vanitygen-0.22-win> .\vanitygen.exe -r '\d\d\d$' Pattern: \d\d\d$ Address: 18ykHEtYHquacgtM2TjxPTg3MvAwebF164 Privkey: 5KAQmGGH5xFVHvXmf8f8uKk7nmcXicqVPMie3fpD7z9VQLk2kxZ PS C:\Users\FYHSSGSS\Documents\University\2021autumn\blockchain\区块链实验课\实验四\实验材料\vanitygen-0.22-win> .\vanitygen.exe -r '\d\d\d88$' Pattern: \d\d\d88$ Address: 1KLPqwyvwuqiY7erifjjyUBrvaB1b81688 Privkey: 5JDQjKxQ56HKkLttr4BRoDq7PdmkALGxhjKNMB4i6nyLU7wjA54
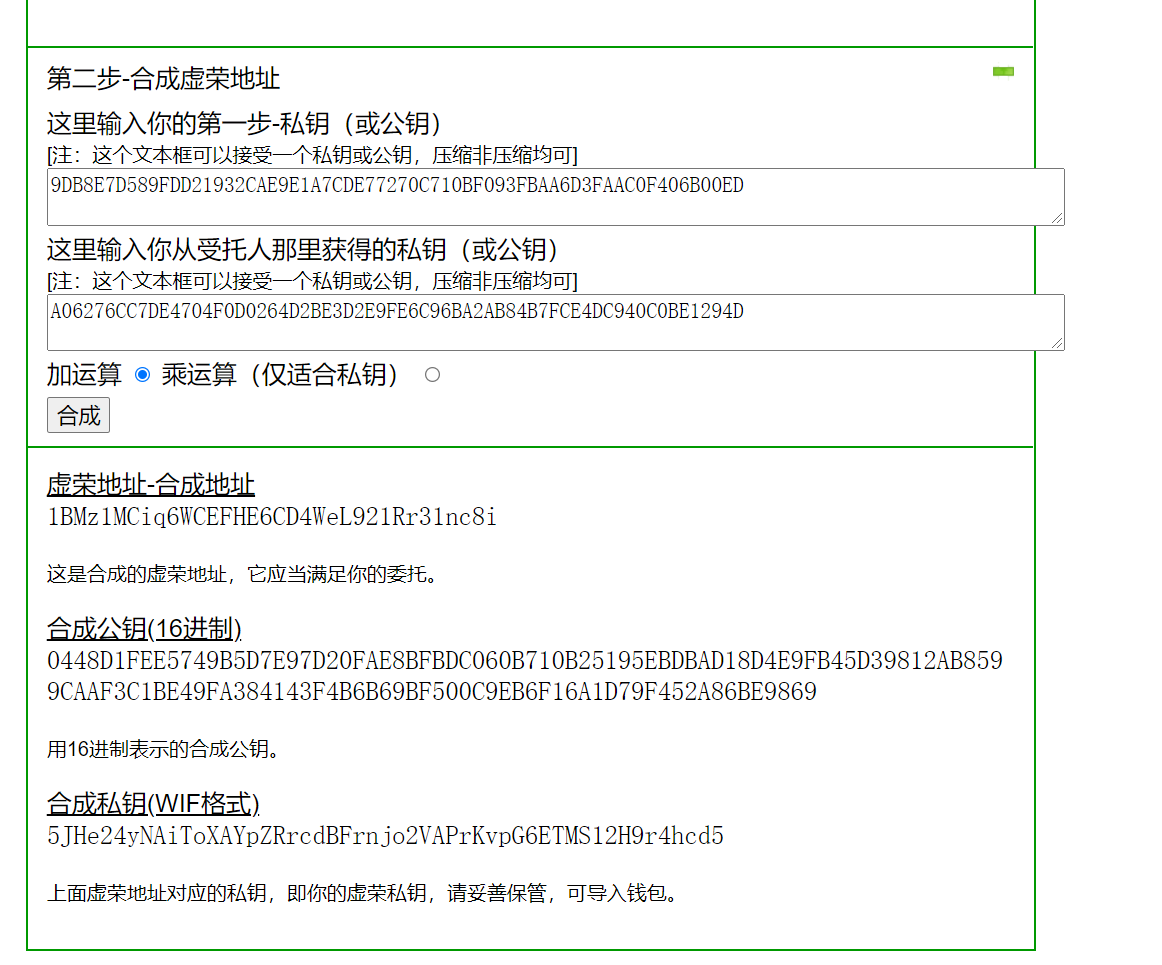
实验五 体验在线生成不同种类的钱包地址 这里放一下实验截图就好。
普通钱包
纸钱包
虚荣钱包
扩展3 藏头诗: 简单的正则。
1
2
3
4
5
6
7
8
import osimport retarget = 'experience' for i, c in enumerate (target): pattern = '^.{%d}%c.*$' % (i + 1 , c) p = os.popen('.\\vanitygen.exe -r "%s"' % (pattern)) res = re.search(r'Address: (.*)' , p.read()) print (res[1 ])
Week5 本周的实验内容是通过构建宠物游戏来进行智能合约编写,所用的语言是Solidity。
(搬一段教程的话)Solidity是一种静态类型的编程语言,用于开发在EVM上运行的智能合约。 Solidity被编译为可在EVM上运行的字节码。借由Solidity,开发人员能够编写出可自我运行其欲实现之商业逻辑的应用程序,该程序可被视为一份具权威性且永不可悔改的交易合约。对已具备程序编辑能力的人而言,编写Solidity的难易度就如同编写一般的编程语言。
课程团队太猛了,花了一年时间写了一个平台,非常好看!
在本实验中,我们选取的编译器版本是0.4.26+
实验一 solidity基础 按照教程一步一步写的,语法很简单,基本不用学。
下面的代码实现的是一个叫做Animallncubators的合约,动物有名字,还有一个独立的DNA。
1
2
3
4
5
6
7
8
9
10
11
12
13
14
15
16
17
18
19
20
21
22
23
24
25
26
pragma solidity >=0.4.12 <0.6.0; contract Animallncubators { uint dnaDigits = 16; uint dnaLength = 10**16; struct Animal { uint dna; string name; } Animal[] public animals; event NewAnimal(uint AnimalId, string name, uint dna); function _createAnimal(string _name, uint _dna) private { animals.push(Animal(_dna, _name)); uint _animalId = animals.length - 1; NewAnimal(_animalId, _name, _dna); } function _generateRandomDna(string _str) private view returns (uint){ uint rand = uint(keccak256(_str)); return rand % dnaLength; } function createRandomAnimal(string _name) public { uint randDna = _generateRandomDna(_name); _createAnimal(_name, randDna); } }
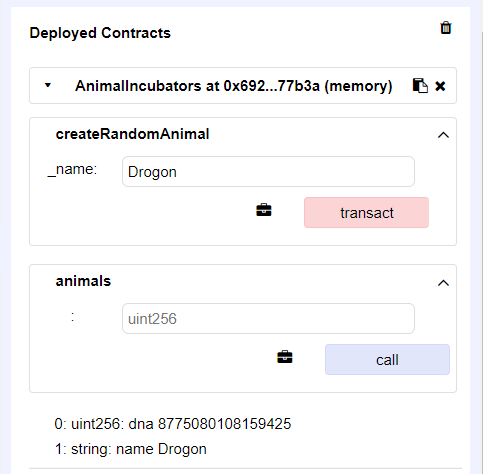
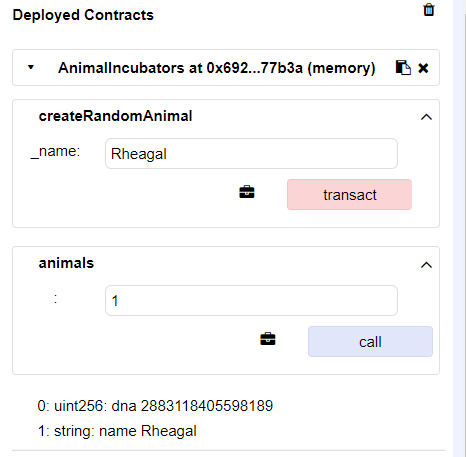
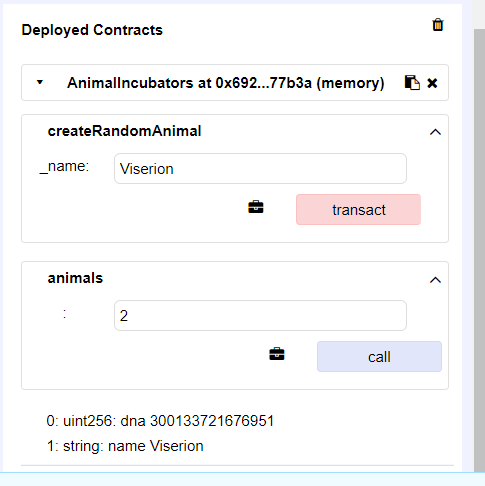
合约实现完成后,我们往后依次添加名为Drogon、Rheagal、Viserion的动物,call他们的ID就会显示他们的信息,比如名字,DNA什么的,如截图所示。
实验二 Solidity进阶——宠物成长系统 在这个实验里,我们在上面的基础上继续扩展合约,新增了每个动物的主人,新建了一个动物ID与主人地址的映射,以及主人动物数量的映射,同时,在createRandomAnimal里限制了必须主人在没有动物的时候才能调用这个函数。
1
2
3
4
5
6
7
8
9
10
11
12
13
14
15
16
17
18
19
20
21
22
23
24
25
26
27
28
29
30
31
pragma solidity >=0.4.12 <0.6.0; contract Animallncubators { uint dnaDigits = 16; uint dnaLength = 10**16; struct Animal { uint dna; string name; } Animal[] public animals; mapping(address=>uint) ownerAnimalCount; mapping(uint=>address) AnimalToOwner; event NewAnimal(uint AnimalId, string name, uint dna); function _createAnimal(string _name, uint _dna) internal { animals.push(Animal(_dna, _name)); uint _animalId = animals.length - 1; AnimalToOwner[_animalId] = msg.sender; ownerAnimalCount[msg.sender] += 1; NewAnimal(_animalId, _name, _dna); } function _generateRandomDna(string _str) private view returns (uint){ uint rand = uint(keccak256(_str)); return rand % dnaLength; } function createRandomAnimal(string _name) public { require( ownerAnimalCount[msg.sender] == 0); uint randDna = _generateRandomDna(_name); _createAnimal(_name, randDna); } }
同时又新建了一个继承于Animallncubators的合约AnimalFeeding,文件名是AnimalFeeding.sol,这里面的feedAndGrow函数很神奇,吃了食物之后DNA融合,进化出一个新的动物,名字也改了。1 2 3 4 5 6 7 8 9 10 11 12 13 14 15 16 17 18 19 20 21 22 pragma solidity >=0.4.12 <0.6.0; import "./Animallncubators.sol"; contract AnimalFeeding is Animallncubators{ function feedAndGrow(uint _AnimalId, uint _targetDna) internal { require(keccak256(AnimalToOwner[_AnimalId]) == keccak256(msg.sender)); Animal storage myAnimal = animals[_AnimalId]; uint _petDna = _targetDna % dnaLength; uint _newDna = uint((myAnimal.dna + _petDna) / 2); _newDna = (_newDna / 100) * 100 + 99; _createAnimal("No-one", _newDna); } function _catchFood(uint _name) internal pure returns (uint) { uint rand = uint(keccak256(_name)); return rand; } function feedOnFood(uint _AnimalId, uint _FoodId) public{ uint _FoodDna = _catchFood(_FoodId); feedAndGrow(_AnimalId, _FoodDna); } }
执行第二只宠物的时候废了,因为一个地址只能有一只精灵。
我们选取三个地址分别生成三只精灵,然后换回第一个地址,准备投喂。
投喂成功,新诞生了一只No-one。
实验三 Solidity高阶理论 新建ownable.sol,这段代码的意义主要有三:
1 2 3 4 5 6 7 8 9 10 11 12 13 14 15 16 17 18 19 20 21 22 23 24 25 26 27 28 29 30 31 32 33 34 35 /** * @title Ownable * @dev The Ownable contract has an owner address, and provides basic authorization control * functions, this simplifies the implementation of "user permissions". */ contract Ownable { address public owner; event OwnershipTransferred(address indexed previousOwner, address indexed newOwner); /** * @dev The Ownable constructor sets the original `owner` of the contract to the sender * account. */ function Ownable() public { owner = msg.sender; } /** * @dev Throws if called by any account other than the owner. */ modifier onlyOwner() { require(msg.sender == owner); _; } /** * @dev Allows the current owner to transfer control of the contract to a newOwner. * @param newOwner The address to transfer ownership to. */ function transferOwnership(address newOwner) public onlyOwner { require(newOwner != address(0)); OwnershipTransferred(owner, newOwner); owner = newOwner; } }
在此基础上,我们新增Animallncubators的一些功能,增加了投喂食物的冷却功能,两次食物间隔必须超过一分钟。
1 2 3 4 5 6 7 8 9 10 11 12 13 14 15 16 17 18 19 20 21 22 23 24 25 26 27 28 29 30 31 32 33 34 pragma solidity >=0.4.12 <0.6.0; import "./ownable.sol"; contract Animallncubators is Ownable{ uint dnaDigits = 16; uint dnaLength = 10**16; uint32 cooldownTime = 60; struct Animal { uint32 level; uint32 readyTime; uint dna; string name; } Animal[] public animals; mapping(address=>uint) ownerAnimalCount; mapping(uint=>address) AnimalToOwner; event NewAnimal(uint AnimalId, string name, uint dna); function _createAnimal(string _name, uint _dna) internal { animals.push(Animal(0, uint32(now), _dna, _name)); uint _animalId = animals.length - 1; AnimalToOwner[_animalId] = msg.sender; ownerAnimalCount[msg.sender] += 1; NewAnimal(_animalId, _name, _dna); } function _generateRandomDna(string _str) private view returns (uint){ uint rand = uint(keccak256(_str)); return rand % dnaLength; } function createRandomAnimal(string _name) public { require( ownerAnimalCount[msg.sender] == 0); uint randDna = _generateRandomDna(_name); _createAnimal(_name, randDna); } }
在这里增加一分钟的限制。
1 2 3 4 5 6 7 8 9 10 11 12 13 14 15 16 17 18 19 20 21 22 23 pragma solidity >=0.4.12 <0.6.0; import "./Animallncubators.sol"; contract AnimalFeeding is Animallncubators{ function feedAndGrow(uint _AnimalId, uint _targetDna) internal { require(keccak256(AnimalToOwner[_AnimalId]) == keccak256(msg.sender)); Animal storage myAnimal = animals[_AnimalId]; require(now >= myAnimal.readyTime); uint _petDna = _targetDna % dnaLength; uint _newDna = uint((myAnimal.dna + _petDna) / 2); _newDna = (_newDna / 100) * 100 + 99; _createAnimal("No-one", _newDna); myAnimal.readyTime = uint32(now) + cooldownTime; } function _catchFood(uint _name) internal pure returns (uint) { uint rand = uint(keccak256(_name)); return rand; } function feedOnFood(uint _AnimalId, uint _FoodId) public{ uint _FoodDna = _catchFood(_FoodId); feedAndGrow(_AnimalId, _FoodDna); } }
最后我们再写一个合约叫做AnimalHelper,实现一些辅助升级功能。
1 2 3 4 5 6 7 8 9 10 11 12 13 14 15 16 17 18 19 20 21 22 23 24 25 26 27 pragma solidity >=0.4.12 <0.6.0; import "./AnimalFeeding.sol"; contract AnimalHelper is AnimalFeeding{ modifier aboveLevel (uint _level, uint _AnimalId) { require(animals[_AnimalId].level >= _level); _; } function changeName(uint _AnimalId, string _newName) external aboveLevel(2, _AnimalId){ require(keccak256(msg.sender) == keccak256(AnimalToOwner[_AnimalId])); animals[_AnimalId].name = _newName; } function changeDna(uint _AnimalId, uint _newDna) external aboveLevel(20, _AnimalId){ require(keccak256(msg.sender) == keccak256(AnimalToOwner[_AnimalId])); animals[_AnimalId].dna = _newDna; } function getAnimalsByOwner(address _owner)external view returns(uint[]){ uint[] memory result = new uint[](ownerAnimalCount[_owner]); uint8 count = 0; for (uint i = 0; i < animals.length; i++) { if (keccak256(AnimalToOwner[i]) == keccak256(_owner)) { result[count] = i; count += 1; } } return result; } }
新建一个小动物,然后投喂。
抓紧时间连续投喂两波
发现第二波执行失败了。
最后看一下getAnimalsByOwner这个函数。
实验四 拓展实验4:solidity高阶篇 更新一版的Animallncubators,新增了攻击力,赢的次数,输的次数。
1 2 3 4 5 6 7 8 9 10 11 12 13 14 15 16 17 18 19 20 21 22 23 24 25 26 27 28 29 30 31 32 33 34 35 36 37 pragma solidity >=0.4.12 <0.6.0; import "./ownable.sol"; contract Animallncubators is Ownable{ uint dnaDigits = 16; uint dnaLength = 10**16; uint32 cooldownTime = 60; struct Animal { uint32 level; uint32 readyTime; uint dna; uint ATK; uint winCount; uint lossCount; string name; } Animal[] public animals; mapping(address=>uint) ownerAnimalCount; mapping(uint=>address) AnimalToOwner; event NewAnimal(uint AnimalId, string name, uint dna); function _createAnimal(string _name, uint _dna) internal { animals.push(Animal(0, uint32(now), _dna, 1, 0, 0, _name)); uint _animalId = animals.length - 1; AnimalToOwner[_animalId] = msg.sender; ownerAnimalCount[msg.sender] += 1; NewAnimal(_animalId, _name, _dna); } function _generateRandomDna(string _str) private view returns (uint){ uint rand = uint(keccak256(_str)); return rand % dnaLength; } function createRandomAnimal(string _name) public { require( ownerAnimalCount[msg.sender] == 0); uint randDna = _generateRandomDna(_name); _createAnimal(_name, randDna); } }
模拟对战环节。
1 2 3 4 5 6 7 8 9 10 11 12 13 14 15 16 17 18 19 20 21 22 23 24 25 pragma solidity >=0.4.12 <0.6.0; import "./AnimalHelper.sol"; contract AnimalAttack is AnimalHelper{ uint randNonce = 0; function winPro() returns(bool){ uint random = uint(keccak256(now, msg.sender, randNonce)) % 100; randNonce++; return (random < 75); } function fight(uint _attackAnimalId, uint _defenceAnimalId) external { if (winPro()) { animals[_attackAnimalId].ATK ++; animals[_attackAnimalId].winCount ++; animals[_defenceAnimalId].lossCount ++; } else { animals[_attackAnimalId].lossCount ++; animals[_defenceAnimalId].winCount ++; } animals[_attackAnimalId].readyTime = uint32(now); animals[_defenceAnimalId].readyTime = uint32(now); } }
Week6 实验 1 会议报名登记系统的基本功能与实现 实现一个会议报名的智能合约,已经给的差不多了,只需要实现delegate和enrollfor函数即可。
其中,trustees是受托人到其委托人的一个映射,是一个不定长数组,每次被委托的人都往后push即可。
enrollFor替人报名,报名逻辑与正常enroll一样,唯一不同的是我们需要在trustees数组中找到委托人,然后以后都报名他。
1 2 3 4 5 6 7 8 9 10 11 12 13 14 15 16 17 18 19 20 21 22 23 24 25 function delegate(address addr) public{ trustees[addr].push(participants[msg.sender]); } function enrollFor(string memory username,string memory title) public returns(string memory){ uint index = 0; for (uint i = 0; i < trustees[msg.sender].length; i++) { if (keccak256(bytes(trustees[msg.sender][i].name)) == keccak256(bytes(username))) { index = i; break; } } for (uint i = 0; i < conferences.length; i++){ if (keccak256(bytes(conferences[i].title)) == keccak256(bytes(title))){ require(conferences[i].current<conferences[i].max,"Enrolled full"); conferences[i].current = conferences[i].current+1; if(conferences[i].current==conferences[i].max){ emit ConferenceExpire(title); } trustees[msg.sender][index].confs.push(title); } } uint len = trustees[msg.sender][index].confs.length; require(len>0,"Conference does not exist"); return trustees[msg.sender][index].confs[len-1]; }
问题 应在合约的哪个函数指定管理员身份?如何指定? 需要在合约的构造函数处制定,根据实际情景,应该是创建这个会议体制的人为管理员,所以指定admin为msg.sender。
在发起新会议时,如何确定发起者是否为管理员?简述 require()、assert()、 revert()的区别。 require(msg.sender==admin,"permission denied");
require和assert都是条件声明,这三种方式的执行逻辑是相同的:
require(msg.sender==admin,"permission denied"),assert(msg.sender==admin,"permission denied"),if(msg.sender!=admin) {revert("permission denied");}。
区别在于revert和require在执行失败后会返还gas,但是assert就算执行失败了也会照样扣除gas。
简述合约中用 memory 和 storage 声明变量的区别 Storage 变量是指永久存储在区块链中的变量。 Memory 变量则是临时的,当外部函数对某合约调用完成时,内存型变量即被移除。 你可以把它想象成存储在你电脑的硬盘或是RAM中数据的关系。
一般情况下不用管这俩关键字, 默认情况下Solidity 会自动处理它们。 状态变量(在函数之外声明的变量)默认为“存储”形式,并永久写入区块链;而在函数内部声明的变量是“内存”型的,它们函数调用结束后消失。
然而也有一些情况下,你需要手动声明存储类型,主要用于处理函数内的 结构体和 数组 时。这两个属性主要用于优化代码以节省合约的gas消耗,目前只需知道有时需要显式地声明 storage 或 memory 即可。
实验二 学习用 Truffle 组件部署和测试合约 用npm安装truffle。
之后写测试合约来鉴定功能是否正常。
1 2 3 4 5 6 7 8 9 10 11 12 13 14 15 16 17 18 19 20 21 22 23 24 25 26 27 28 29 30 pragma solidity >=0.4.25 <0.7.0; import "truffle/Assert.sol"; import "truffle/DeployedAddresses.sol"; import "../contracts/Enrollment.sol"; contract TestEnrollment{ //测试注册后,是否返回正确注册信息(仅测试name即可) function testSignUp() public { Enrollment en = new Enrollment(); (string memory name, ) = en.signUp("alice","male"); (string memory expected_name, ) = ("alice","male"); Assert.equal(name,expected_name,"signup failed"); } //测试管理员添加新会议是否成功 function testNewConf() public{ Enrollment enroll = new Enrollment(); string memory expected = "conf1"; Assert.equal(enroll.newConference("conf1","beijing",30),expected,"new conference failed"); } //请测试enroll函数,确保当用户报名后,其已报名会议列表中有该会议。提示:不要忘记先由管理员创建会议。 function testEnroll() public{ Enrollment en = new Enrollment(); string memory expected = "conf1"; en.newConference("conf1","beijing",30); Assert.equal(en.enroll("conf1"), expected,"Enrolled full"); } }
代码写完后,进行测试。
可以看到测试成功。
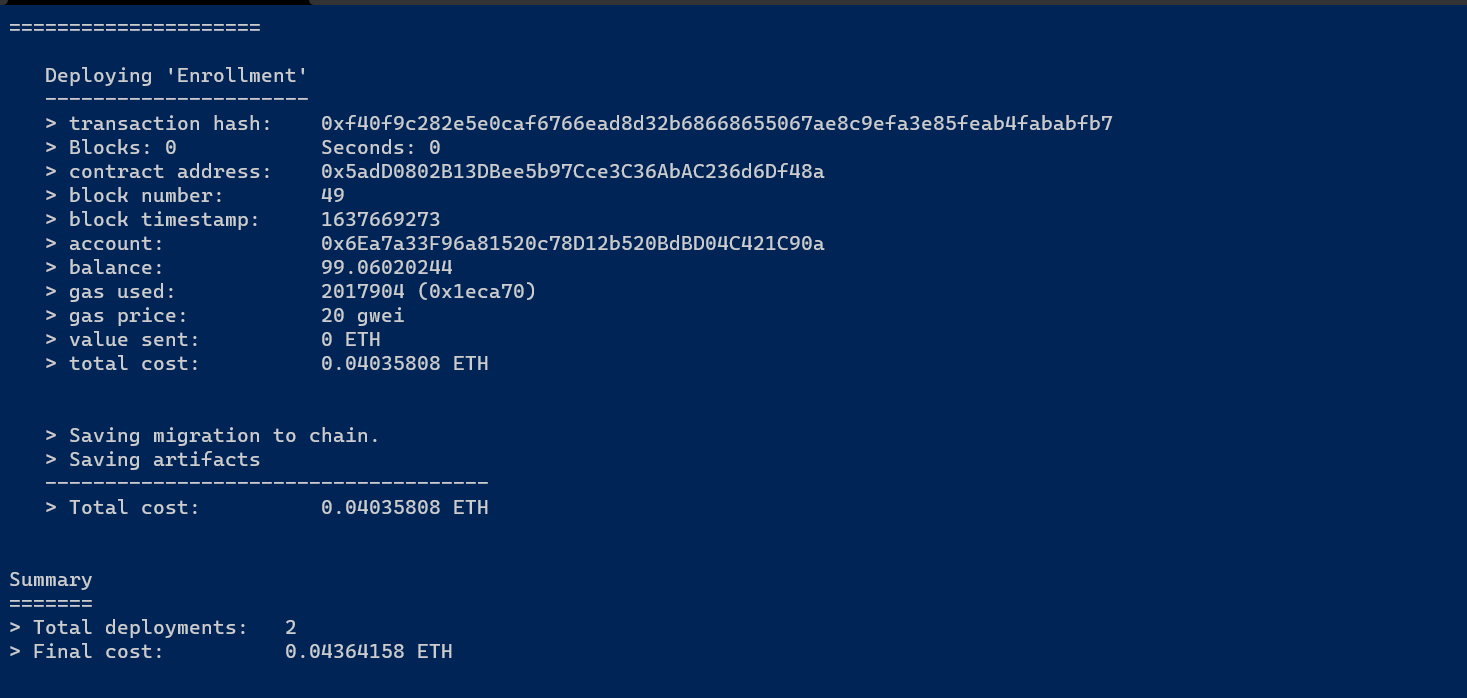
合约部署成功。
部署之前会先进行链的初始化,会在本地保存在一个json文件中。之后需要进行合约 的编写,进行详细的合约规定。第三步需要对合约进行编译,将之前的json文件中的 ABI和EVM code进行获取编译。第四步实现合约的部署,将已经实现好的合约部署 到网络,如下截图:
实验三 利用 Web3.js 实现合约与前端的结合 我们需要在:src/contracts/contract.js补充合约信息,以及src/component/xx组件/index.js 补充web3交互代码,其中conflist和signup中有简单的样例。
delegate部分:
1
2
3
4
5
6
7
8
9
10
11
const mapDispatchToProps = (dispatch ) => { return { submit (address ) contract.methods.delegate(address) .send({from :window .web3.eth.accounts[0 ]},function (err,res )console .log(res)}) .then((res )=> console .log(res)); dispatch({ type : 'submit_delegate' }) },
signup部分:
1
2
3
4
5
6
7
8
9
10
11
12
const mapDispatchToProps = (dispatch ) => { return { submit (username,extra ) contract.methods.signUp(username, extra) .send({from :window .web3.eth.accounts[0 ]},function (err,res )console .log(res)}) .then((res )=> console .log(res)); dispatch({ type : 'submit_signup' }) },
对conflist部分做如下修改,特判了res为空的情况。
1
2
3
4
5
6
7
8
9
10
11
12
13
14
15
16
17
18
19
componentDidMount ( contract.methods.queryConfList() .call({from :window .web3.eth.accounts[0 ]},(err,res )=> { this .setState({loading : true }); if (res != null ){ for (var i=0 ;i<res.length;i=i+2 ){ data.push({title :res[i],detail :res[i+1 ]}); } } else { data.push({title :'no' ,detail :'no' }) } }) .then(()=> { this .setState({loading : false }); });
同理,myconf也是:
1
2
3
4
5
6
7
8
9
10
11
12
13
14
15
16
17
18
19
20
21
componentDidMount ( contract.methods.queryMyConf() .call({from :window .web3.eth.accounts[0 ]},(err,res )=> { this .setState({loading : true }); if (res != null ){ for (var i=0 ;i<res.length;i=i+1 ){ data.push({'title' : res[i]}); } } else { data.push({'title' : 'no' }); } }) .then(()=> { this .setState({loading : false }); });
之后再在contract.js部分填上abi和合约地址,这里不再赘述。
完善前端过后npm build,然后npm start运行此框架。
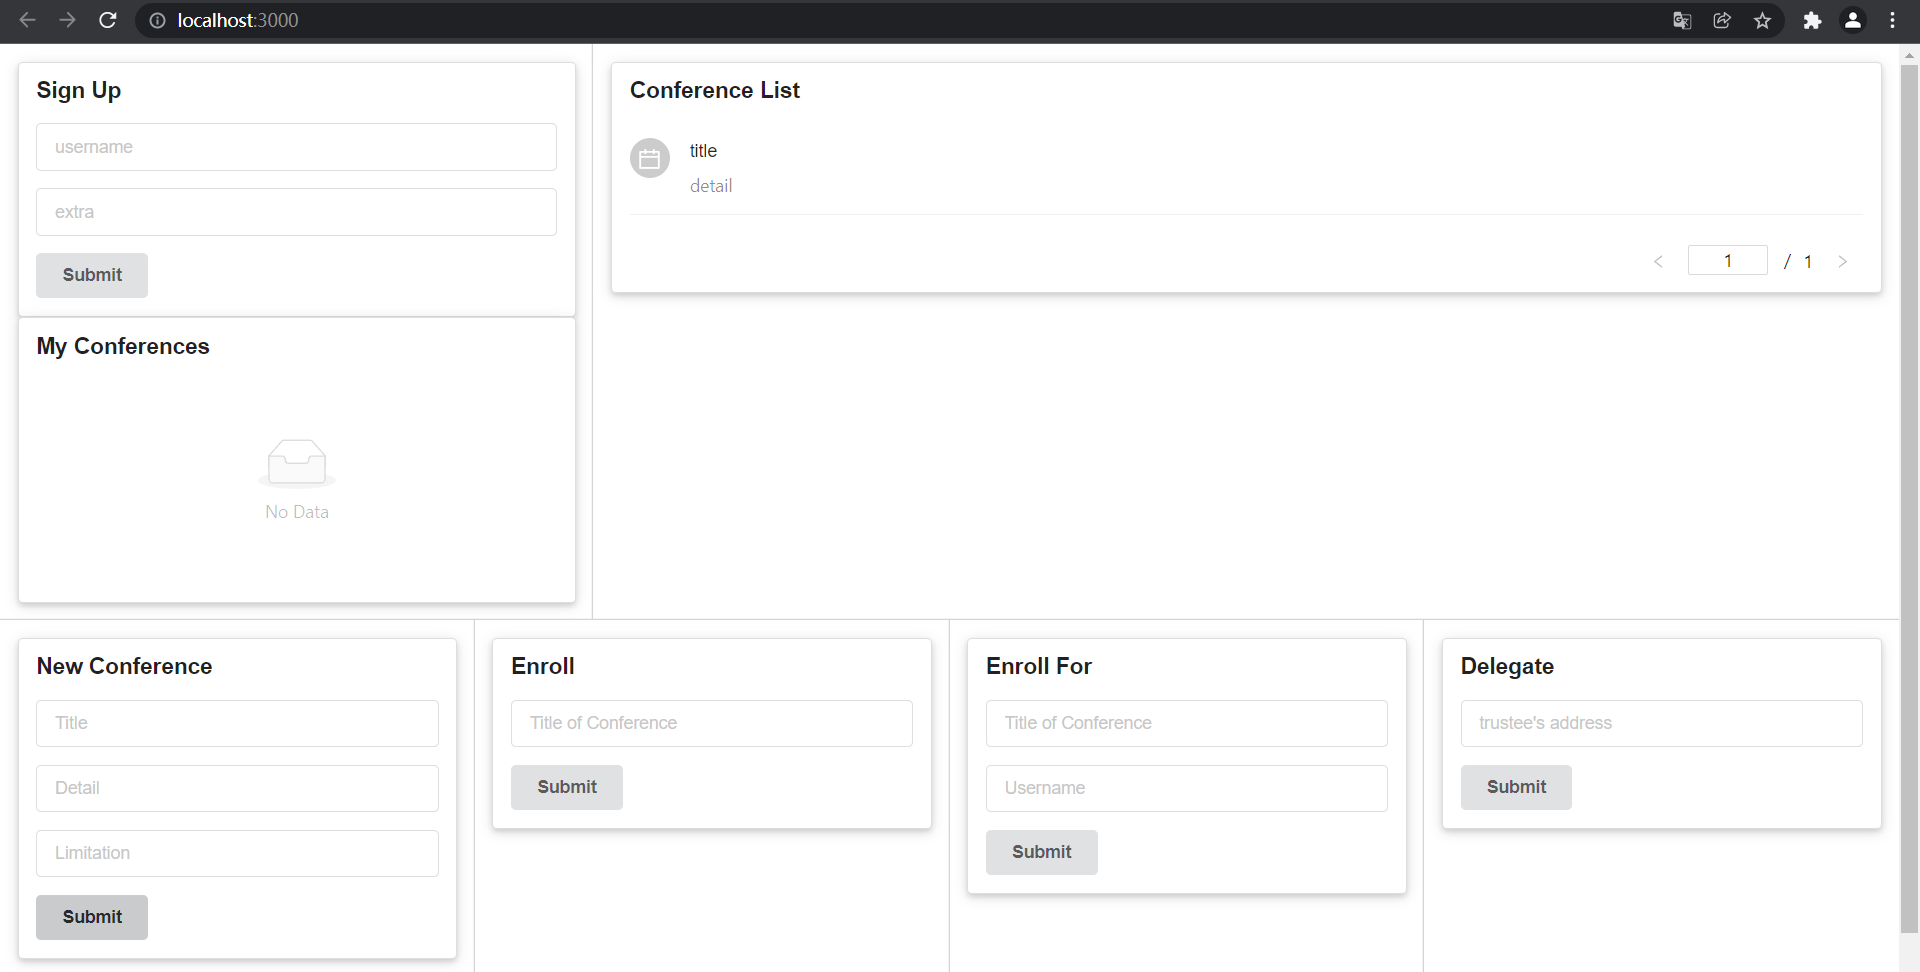
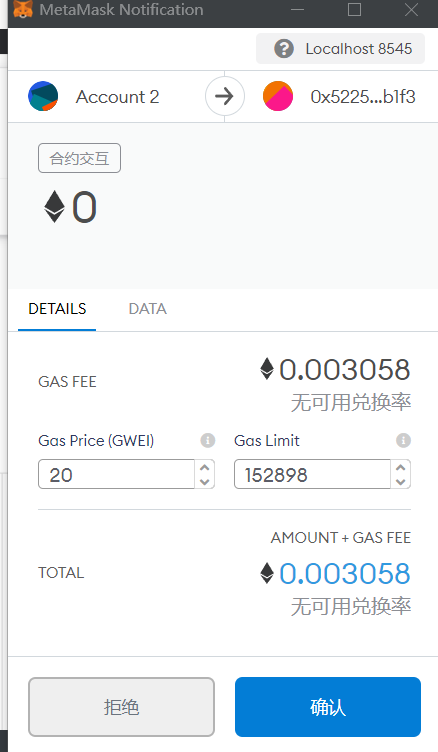
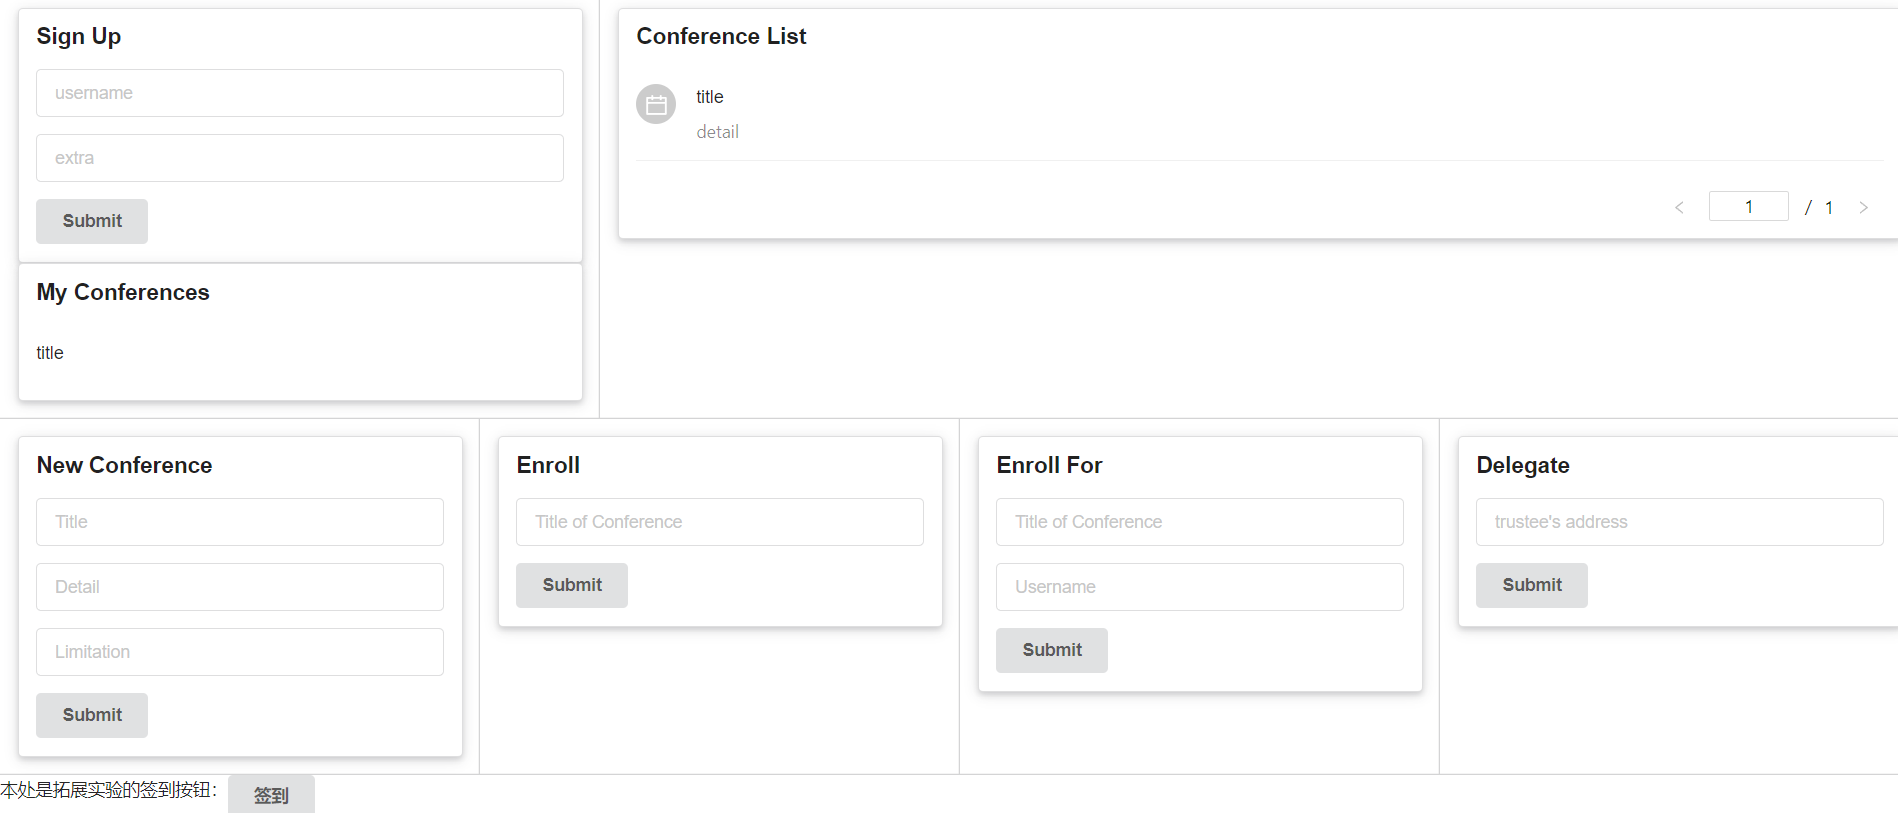
运行成功,并且能打开metamask。
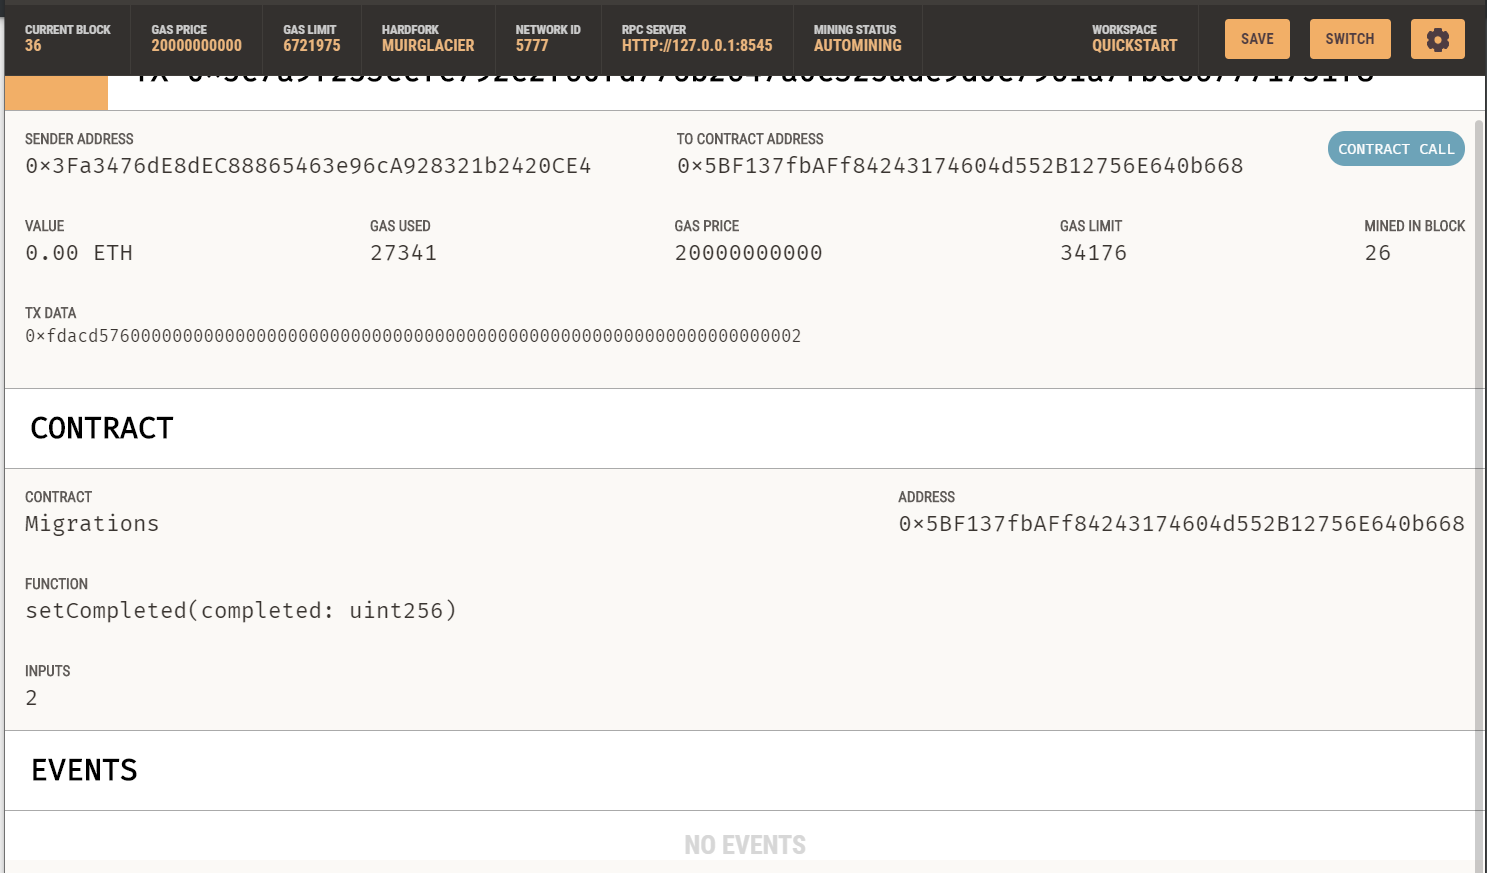
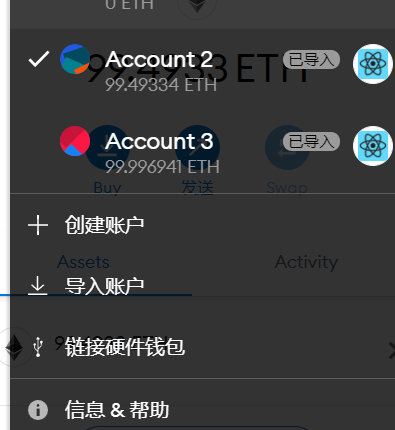
下面测试功能,先导入两个账户,私钥从ganache上找到。
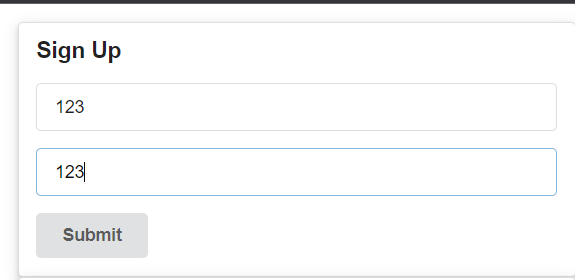
注册用户:
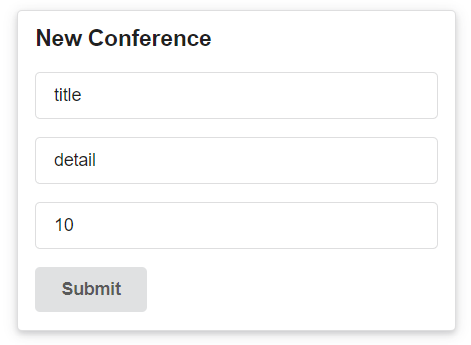
新建title:
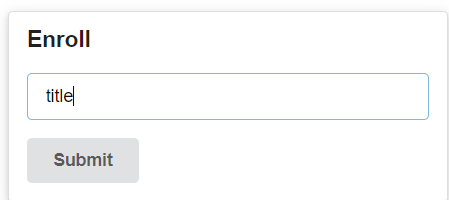
为我自己报名:
支付后:
可以看到My Conferences里添加了本次会议。
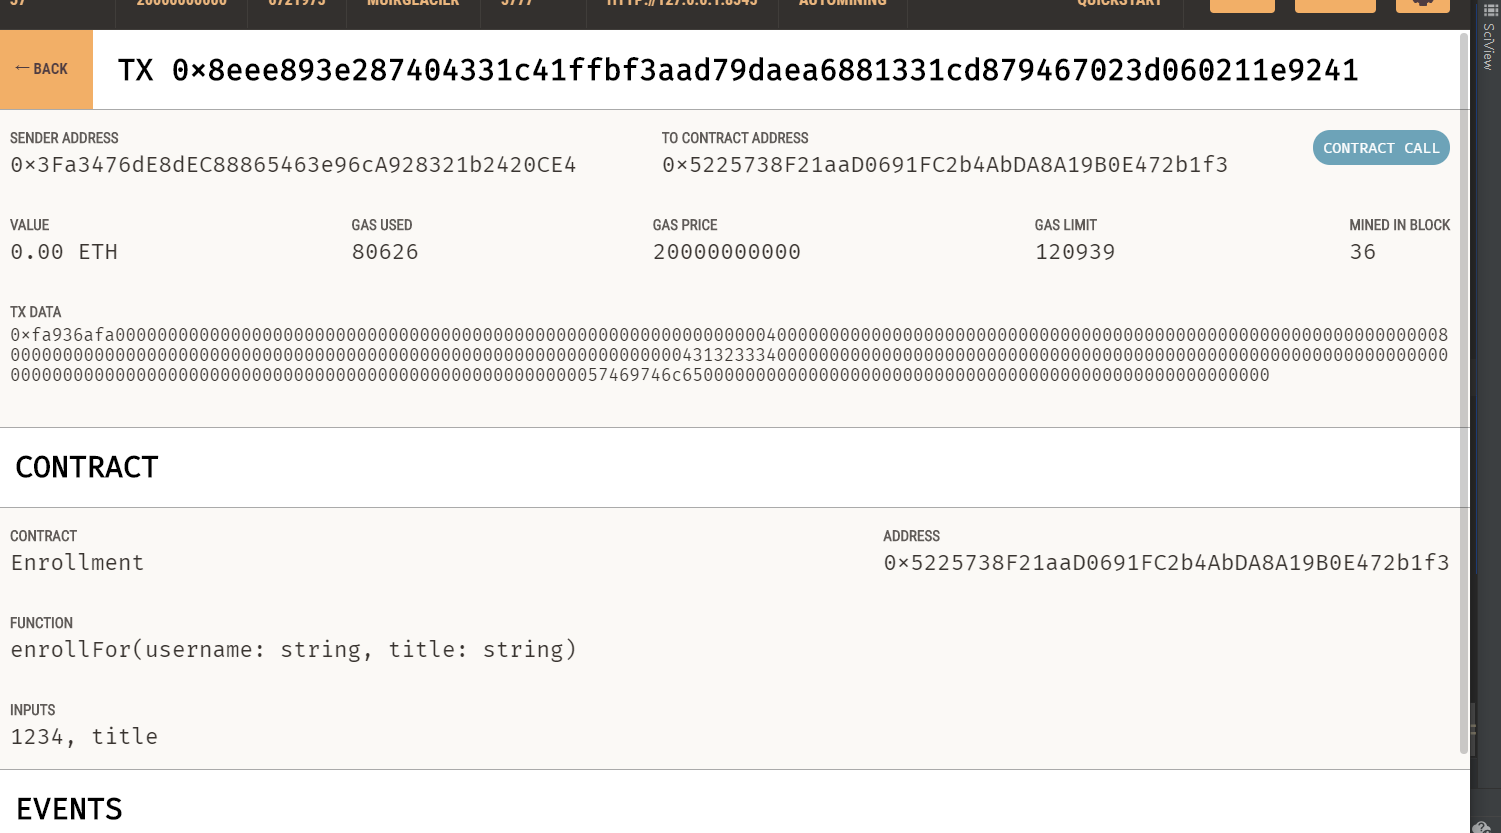
之后我们用account3注册一个新账号叫1234,截图重复不再展示,委托他报名。
执行成功。
